Monday, March 30, 2015

ABUNDANCE OF FORSYTHIA CENTERPIECE...

I was blessed with an abundance of Forsythia when we bought this house.  There is a whole row of Forsythia bushes planted along the left side of our property. They are scraggly, overgrown and definitely could use some cutting back. I tried my best to do that this weekend when I decided to bring a few stems inside for a centerpiece.


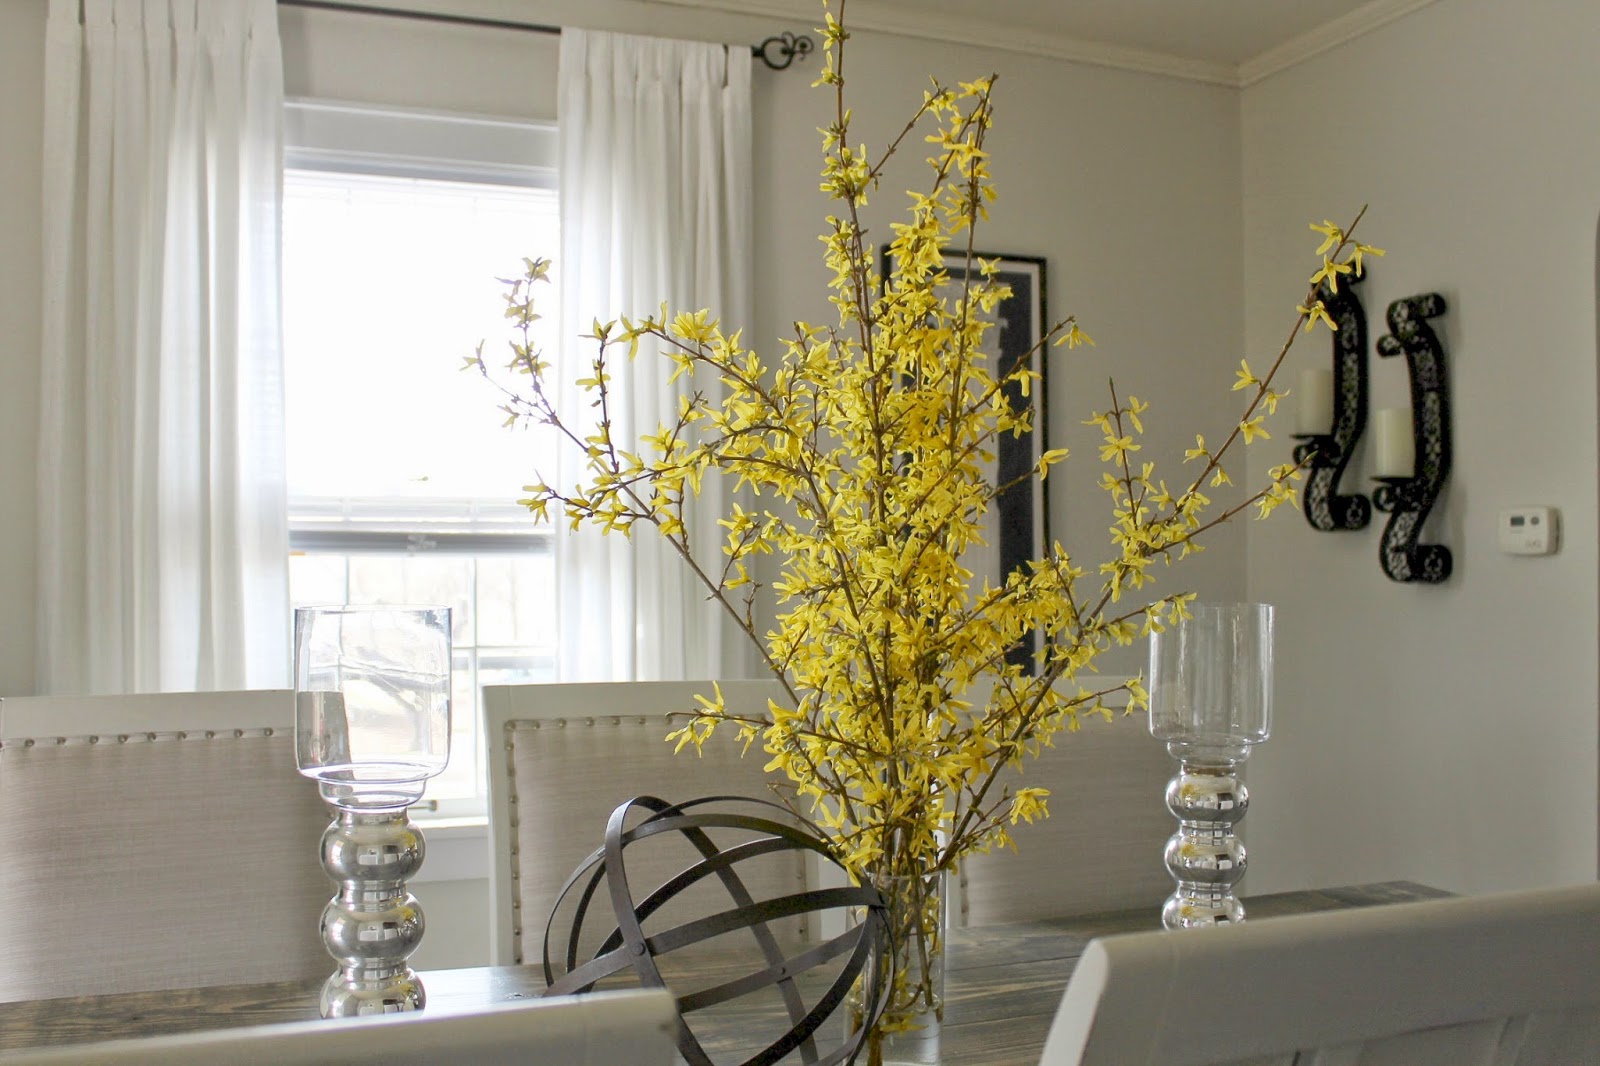
Don't the vibrant yellow flowers look just lovely with the pale gray walls and black accents? BEAUTIFUL!

This is just the tip of the iceberg.  There's a LOT more trimming that needs to be done... you know, in case you want to come over and get some for yourself.

I'll leave the shears by the back door.  Hehehe


Pay no mind to the fact that there are no candles in those gorgeous mercury glass candleholders that I got for $9.95 each from Marshalls a little while back.  I couldn't find them. I know they are around this house somewhere! Where; however, is the question! Wouldn't some lavender colored ones look fabulous here?  Maybe I can find some before Easter to give this table a little added burst of Spring loveliness.


Speaking of Marshalls, we just got one in our area a few months ago and I can tell you it is quickly becoming my favorite store for home decor. They are so reasonably priced!


The only problem is that if you pass something up you probably will not get the chance to go back and get it. They only stock leftovers and once something is gone, it's GONE! I passed up a gorgeous mirror that would have been great over the fireplace and I am kicking myself.  However, I didn't pass up the metal orb seen here, which was the same price as the candleholders, $9.95. I LOVE IT, don't you?


I picked up the large silverware from Amazon.com with some of my saved up credits. They are perfect for the dining room and one of the last purchases on my dining room makeover list.

Ironically enough they had the exact same ones at Marshalls last time I was there but I had already ordered mine from Amazon. I did get mine cheaper from Amazon because of my card credits but I like the fact that Marshalls sells each piece separately which makes it easier and cheaper to pick and choose which ones you want instead of having to buy the whole set like I did.

As much as I like those though, the best decoration in the room is the Forsythia...God's creation...and it was FREE.

Doesn't the pop of color just make your heart sing?


I LOVE IT!!!  The one thing I don't love however is the huge BROWN elephant in the room. Do you see it? Yeah, that's the last big project on my dining room makeover list and it WILL be changing colors in the next week or so. Problem is I have not officially decided what color it should be. It's a toss up between black with silver hardware and white with black hardware. What do you think I should do?  Paint it white or black?


I don't want that side of the room to feel too heavy but I have unofficially decided on black because I think it will balance out the room. However, I would really love your opinion.

Oh and if you stop by with your opinion, feel free to cut yourself a little bit of Forsythia to take home with you. I've got plenty to share!!!

Ciao,


Sharing at:

Cedar Hill Farmhouse
A Stroll Thru Life
Home Remedies
Coastal Charm
Savvy Southern Style
Bless'er House
Imparting Grace

YTTSfeatureBH

PS...This post was ALSO featured HERE along with posts from several other fabulous blogs. Go check it out!

Wednesday, March 25, 2015

GLAMMING UP THE SCONCES...

Well we've made it halfway through the work week...YAY!, so I say Happy Wednesday to you!

Temporarily moving away from talking about the dining room redo (as I'm sure you are all SICK of hearing about it), I have a little living room update to share with you today.

This old house of ours came with a pair of sconces over the fireplace mantel. They are vintage, they are brass and they are original to the house. Though we have never used them much I do like that they are there. I feel they add a little interest to the fireplace wall that would otherwise be dull, boring and bland without them.


However, I have never particularly liked them. They just really weren't my style but I never even thought of changing them out because, well...they are original to the house...and there was nothing wrong with them. When we first moved in they had crystals hanging from them (you can just barely see those in this moving in day photo)...


Nice wallpaper, huh?  I took the crystals off and put them away shortly after that picture was taken. I saved them because they were originals and I figured I might decide to use them again someday, but if not, I still didn't want to get rid of them. They are a part of the house, if you know what I mean. They belong here!

I never really cared for the shades either. I'm not sure those are originals because they still sell the exact same ones today but, I wasn't sure what I wanted to replace them with so they have remained for the entire 4 1/2 years we have lived here. You have probably spotted them in every fireplace shot I have ever posted. I bet you have even wondered if I was ever going to update them, hehehe.


Over the years I have thought about changing the shades out but as I said I really didn't know what I wanted to replace them with. Did I want a fabric shade or another glass one? What color, pattern...etc.? I couldn't decide! However, some of the recent changes in the dining room has helped me with that.

I incorporated a little glam and sparkle in the dining room with the chandelier and I am also incorporating a little black as well (the china hutch will be black as well as some of the DIY wall art). I figured it would be fitting to add those elements to the living room too since they are adjoining rooms.

To accomplish this I cleaned up and rehung the old crystals on the sconces and then added a couple of inexpensive black shades I found on ebay...


Ta da, instant update and I love them now!


So much better, right?


I only spent a few dollars on this upgrade and I couldn't be happier with it.  I feel as if these sconces were always meant to look this way.  Those crystals add the touch of glam and those shades add just the right amount of contrast and sophistication.  I wish I would have done this 4 1/2 years ago.  Hahaha.

Do you have a boring, outdated pair of sconces that you hate?  Instead of spending a ton of money on new ones try glamming up or updating the ones you already have.  Change out the shades or add some crystals, or both. It's an inexpensive fix and you might just find that you like them after all.

I have a few more updates in mind for the living room and hope to start on those once the dining room makeover is complete and once the new IKEA store opens up in St. Louis this fall. Yes, we are getting an IKEA...I CAN'T WAIT!!!

Also, I will be back soon to share with you all the details of how we built our gorgeous FARMHOUSE TABLE.

Ciao,


Friday, March 20, 2015

A GOOD LOOK AT THE DINING ROOM CHAIRS...

Happy Friday Everyone!!

If you have been reading my blog for any time at all you know that I have been making over the dining room. It seems I have been working on it forever (and I have). I have attempted to redo this room about four different times since we bought this house (yes, my sister-in-law pointed out to me the other day that I have now had FIVE different table and chairs in this dining room since we've moved in).  Nothing like friends and family to make you feel good about things, huh?  The reason for all these changes is that nothing seemed to be working.  I was trying to stay true to the era of the house and incorporate things I already had as well. The problem was that none of it was truly my style or taste and I hated every last bit of it. I have learned something through all of this though and that is that no matter what age the house, what trends are happening at the time, and no matter what everyone else is doing, you should ALWAYS, ALWAYS, ALWAYS stay true to your own style and taste. It will save you a LOT of heartache, time and MONEY in the long run!!!

Anyway, I FINALLY have this dining room figured out and I am so so very happy with how things are coming together.

As you know I purchased a table and six chairs from Craigslist a few months back for $50.  I only needed the chairs but had to take the table with them. Since I didn't need the table (because I was planning to build a farmhouse style table) I gave it away to someone who did need it. The chairs I made over to suit my plans and style for this dining room. You can read all about them HERE, HERE & HERE. It took what seemed like forever to prime, paint, seal and upholster them but I am finally done with all six of them and am very proud of how they turned out.

Today I want to share with you the full reveal of my little chair makeover but first let me share with you the inspiration for my chairs.


As always my inspiration comes from Restoration Hardware as I love everything they sell and rustic luxe is completely my taste and style.

Now if we lived in a perfect world I would've just bought six Restoration Hardware chairs and saved myself a lot of time scouring Craigslist for chairs that would work and also saved myself a ton of trouble and work redoing them...BUT...as we all know, we do NOT live in a perfect world...AND...we all do NOT have the thousands of dollars that it would take to buy six RH chairs. Hence the reason for my search for and makeover of these chairs...


They were dark wood with lots of scratches and the upholstery (though I did not take a before pic of it) was disgustingly dirty and stained.  Even after steam cleaning them there was no salvaging it! However, some primer, paint, new fabric and lots of elbow grease made these chairs look brand new again and like something straight out of the RH catalog.


In some ways they are similar to my inspiration chair.  They may not be french in design but they are square backed with white woodwork and linen fabric (well my fabric is faux linen but still nice), so in my book that makes them similar.


Most importantly I love mine as much as I love theirs and they didn't cost me an arm and a leg.  The total for all six chairs and the stuff needed to make them over came to $75 (I already had the fabric so that cost was not included). That's WAY less than even one RH chair.

I couldn't take the backs of the chairs apart to upholster the back without breaking them so I just painted the existing fabric that was there.  Not my preferred choice but it really doesn't look bad at all.  Of course my poor photography skills and the dark, cloudy weather does not do them justice.  Hehehe.


I didn't want my chairs to look too new so I distressed them ever so lightly to give them sort of a time worn charm...


I also gave them a little added sophistication with silver nail head trim (my absolute favorite part)...


The nail heads are actually plain ol' silver thumbtacks from Wal-mart for $1.88 a package.  I used them not only because they were cheaper than upholstery tacks but because the nail ends were shorter.  I was afraid real upholstery tacks would go all the way through the back of the chair which would have been a disaster. The thumbtacks worked out great though and if you don't tell anyone, I won't!


Can you tell I am super happy with how these chairs turned out?


I am really proud of them.  It was hard work but they turned out really well considering how they started out and that they were only $50.

Did I tell you that I am SUPER happy with his how this whole dining room makeover is coming along? Yes, I'm sure I did! Hehehe. Anyway, most of the major projects are done with the exception of painting the china cabinet. I hope I can get to that in the next month or so. Once that is done all I will have left to do is get some new art and accessories. That will happen as money allows.

In the meantime, I hope to get a chance to share some pictures and all the details of my new DIY farmhouse table with you. As soon as the sun pops back out and I get some time to play, I will certainly do that.

Until then, Ciao!


PS...This post was featured...

my feature button

Sharing at:

Home Remedies...Talented Tuesday
Between Naps on the Porch
Stonegable...The Scoop
A Stroll Thru Life
Karens Up On The Hill
Bless'er House
Imparting Grace
From My Front Porch To Yours
Common Ground


Monday, March 16, 2015

FARMHOUSE TABLE SNEAK PEEK...

With the exception of a couple more coats of sealer, the farmhouse table is done. YAY!!

I figured I would give you a little sneak peek until I get a chance to get some good shots of it.  I had plenty of sunshine yesterday for taking good pics but because I had to get ready for our evening church service shortly after getting it finished I ran out of time for picture taking.  However, I think from the few I did get, you can see how nice it turned out.


The finish turned out a little darker than I had hoped.  I was going for a light weathered wood look, perhaps a driftwood appearance and this turned out quite a bit darker than I was expecting, however, I am still tickled with it. I absolutely LOVE it!


I hope to be back later in the week with some GOOD overall shots of the room. I will also try to give you all the details of how I built the table, what things worked and what things I would change about the building plans I used.


I will also give you a good look at the finished chairs, that is if my photography skills...or lack thereof, don't betray me.

Now all I have left to do in order to finish the dining room redo is paint the china cabinet, procure some new wall art and buy a few accessories. It's all coming together now and I can't wait to see the finished room.  I just know it's going to be gorgeous.

Well until we meet again, have a fabulous life and enjoy the warm spring weather, wherever you are!

PS...This post was featured at From My Front Porch To Yours and Common Ground...go check it out!

Ciao,


Linking up to these parties:

No Minimalist Here...Share Your Style
Imparting Grace...Grace at Home
From My Front Porch to Yours
Cedar Hill Farmhouse...The Scoop

Friday, March 13, 2015

PROGRESS ON THE FARMHOUSE TABLE...

It's Friday, YAY!!!

I hope you all have a wonderful weekend. It's going to be cloudy and rainy all weekend here in my neck of the woods so I will pretty much be working indoors all weekend long. I hope it's looking better weather wise wherever you are!

Anyway, since I will be hanging out indoors I hope get my Farmhouse table finished.

We got the top put together last night.


It's not attached to the frame yet we just laid it on top to see how it was going to work.  I LOVE IT!

It wasn't as difficult to get the top together as I thought it might be but we still faced some challenges. A couple of the boards were a tad bit warped. Not bad and nothing we couldn't work with, it just made things a little more difficult.


We chose the best boards we could find at Lowes and they worked out okay. We knew going into this project that we would probably deal with this sort of thing because unless you buy very expensive furniture grade materials warping is just something you can't avoid.  Of course this is meant to be a rustic farmhouse table so perfection is not necessary, right?

The big 4' pole clamps the hubs recently purchased off a local yardsale site helped a bunch in this area.  As a matter of fact we couldn't have done the job without them.


We also would not have wanted to build this table without our new Kreg pocket hole jig and clamp. I can say without a doubt that I will NOT be building anything, EVER, without it!!


I have already been imagining the cool projects I can use this tool on.  

It was super easy to use and made assembly a breeze.


All the joints on my table are SUPER strong too.  I LOVE this tool!!!


By the way and in case you are interested in building a table like this for yourself, I used THIS free plan from anawhite.com. Her site has a million and one free plans for all sorts of furniture and things and they all include a material list and cut list.  There is also a plan for a table like mine that doesn't require the use of a pocket hole jig in case you don't want to spend the extra money for that tool...though I would suggest getting the jig. It made this job SOOOO much easier!

Now all I have left to do is give the entire table a good sanding and then it will be ready to stain and seal.

I want to do the sanding, staining and sealing...AND take it upstairs before we permanently attach the top. This thing is a beast. The top itself feels like it weighs 100 pounds...OR MORE...so I think trying to carry it upstairs all in one piece is completely out of the question. LOL!!

I can't wait to get her finished and get her in her place in the dining room alongside the chairs I just made over.  I just know they will be a match made in dining room heaven.

After that I can get started on giving the china hutch a little makeover; though, I might take a week or two off before I tackle that project.  I'm pretty wore out after doing the chairs and table back to back, if you know what I mean. I don't want to take too much time off though because I do want to eventually get this dining room makeover finished and that's the last BIG project on the list. Once that's done it's smooth sailing with just a few small projects and accessorizing. Yippee!!

Well, have a FABULOUS weekend and please make sure you stop back by here next week to see the finished results of the Farmhouse table and the dining chair makeover.

Ciao,


Wednesday, March 11, 2015

THE BEGINNINGS OF A FARMHOUSE DINING TABLE...

Hey!

Just a quick post to let you all know that the dining room chairs are officially done.  YAY!!

I don't have any pictures of them to show you as of yet as it has been VERY cloudy, dark and rainy here the past few days and since the time change it's also been too dark to snap any morning shots before heading off to work. No fear though, I will make sure you get to see them soon.

In the meantime, I did want to show you the beginnings of my new FARMHOUSE DINING TABLE.

We bought the wood over the weekend...


Doesn't look like much, does it?

We cut all the pieces to length Monday evening after work and then put the base together last night.


Now comes the hard part...putting the top together.  Every board has to be perfectly flush and even with one another to get a smooth table top. I hope that's easier than it sounds.

I have been wanting this table for a long time though so I think I am up for the challenge.

The only fear I have about this whole project is the fact that I had to use pressure treated, water resistant lumber for the legs. That's all I had available to me as the stores around these parts do not sell untreated 4x4 lumber. I'm not sure I will be able to get them to stain right. It will take at least six months for them to dry out enough to apply the stain and even then the stain has to be oil based. So, it looks as if I am going to have a table with green legs for at least six months. Not quite the look I was going for but every DIYER knows that EVERY project has its challenges. No worries!! I'm just so happy this table is finally being built.

I can't wait so see it all put together and in place.

Have a great day!!


Friday, March 6, 2015

SWEET & SOUR ZOODLES PLUS A PEEK AT HOW THE DINING ROOM CHAIRS ARE COMING ALONG...

Happy WEEKEND!!

Okay I know you have read the title and might be thinking this is turning into a foodie blog, especially since I just posted a spaghetti squash recipe earlier this week...SKINNY SPAGHETTI SQUASH CHICKEN ALFREDO...I promise it's not but I did get a chance to cook up some SWEET & SOUR ZOODLES (zucchini noodles) this week so I figured I would share that recipe with you too.  I hope you don't mind.


Here's what you will need to make your own SWEET & SOUR ZOODLES...


Once you have gathered all your ingredients and chopped all your veggies, heat your olive oil in a large skillet over medium-high heat...


Throw in all your veggies and saute for 3-4 minutes or until they are al dente (cooked but still a little firm)...If you wanted to add some chicken or pork to this recipe you could do that at the same time you saute your veggies.


Throw in the zoodles and sauce and let everything cook for another few minutes...


Serve up with a little soy sauce and an egg roll or two and ENJOY!!!


QUICK and EASY!

I love zoodles and I have tried them a couple different ways in the past month or so.  They are super easy to make, really good for you and they are truly tasty.

To make the zucchini noodles I used the Veggetti that I found for $15 at Dollar General in the "As seen on TV" section.  It's super easy to use and doesn't take up much room.


I hope you will try this recipe. IT'S REALLY GOOD!

Now on for some way more important news...PROGRESS ON THE DINING ROOM CHAIRS---

They are all painted, distressed and sealed...all SIX of them...and boy that took awhile!!!!, I have now begun the upholstery.  I got two of them finished last night.  They look FANTASTIC!! if I do say so myself...


I love the silver nail heads (which are actually just plain ol' thumbtacks, shhhh) with the natural colored trim I found at Joann Fabric & Crafts and the linen look fabric I already had.


Very SOPHISTICATED and very Restoration Hardwareish, don't you think?

Of course you know I will be willing to share a full reveal of all six chairs with you once they are done AND, when they are done, I will be starting on the table.  I can't wait!

Until then, I hope you have a wonderful day and do be sure to enjoy the weekend too.  It is supposed to be a little warmer and more spring like.  Sounds good to me. I'll take it!

Ciao,


Blogging tips