Wednesday, October 12, 2011

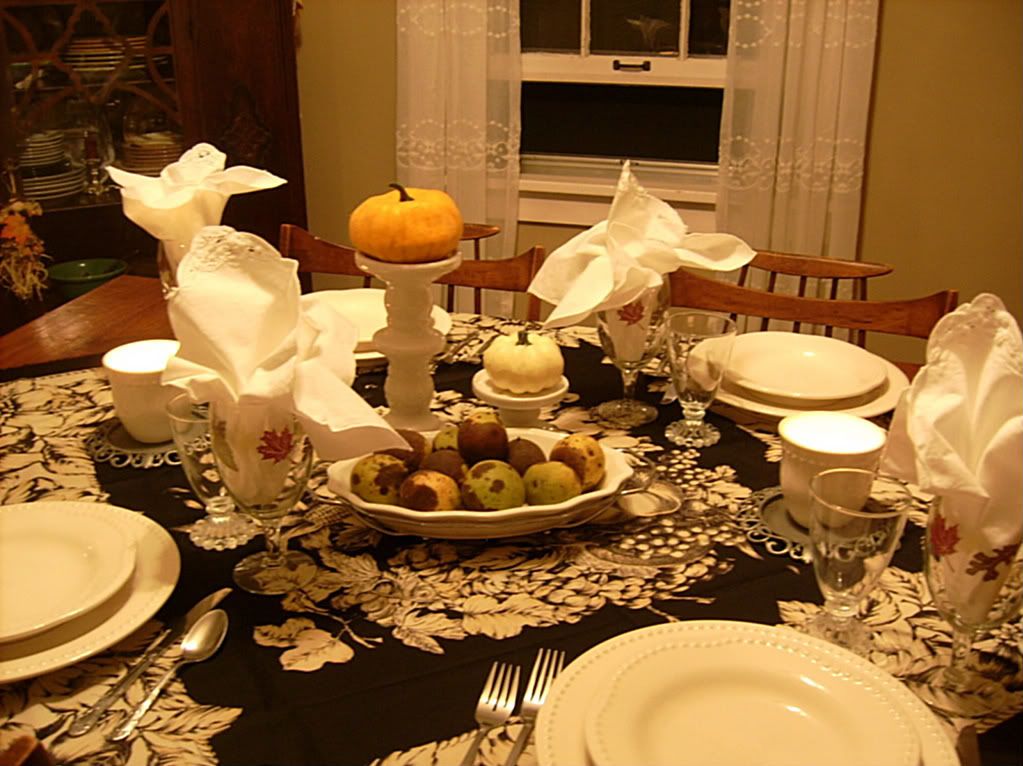
"FALL AT IT'S FINEST" TABLESCAPE

The leaves have finally turned, changing the countryside into a colorful tapestry of reds, golds, oranges, greens and browns...the fragrance of fallen leaves fills the air as if to say, come lay down and enjoy nature's blanket...excitement abounds as children anxiously await a trip to the pumpkin patch and to snuggle in for a hayride...cider is brewing on an open fire and s'mores are in the making.  WELCOME FALL!!!

Hello all you bloggers out there.  Have you been enjoying fall so far?  I have! My only complaint is that I have a day job and don't get as much time as I would like outdoors to enjoy this beautiful time of year...nonetheless, life is good and I am EATING it up...

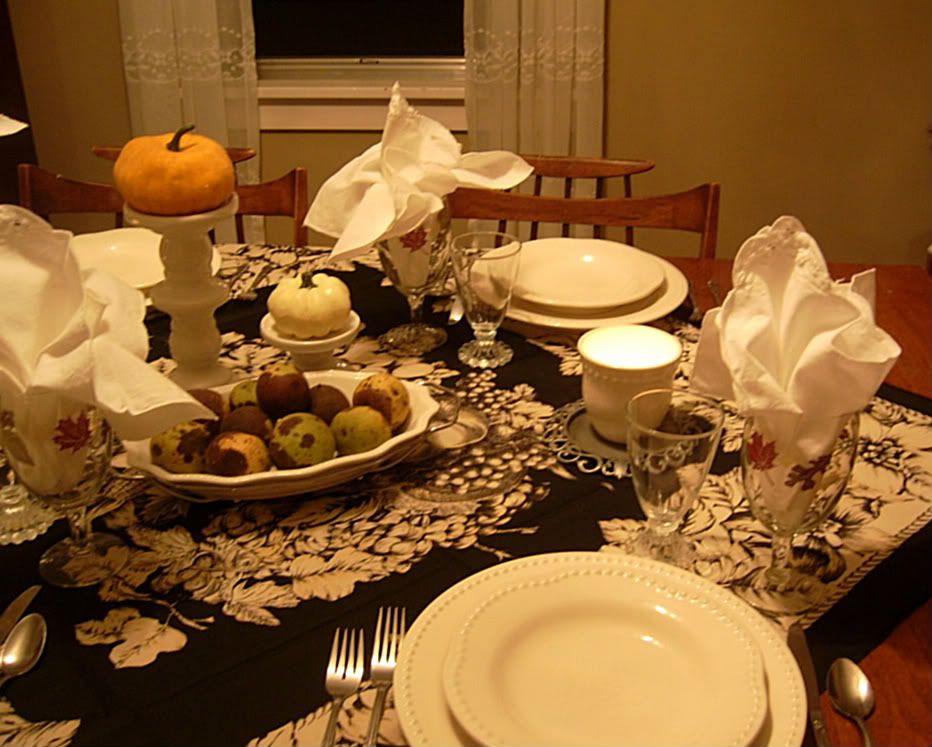
In early spring I found a table scarf at one of the thrift stores here in town and I just knew it would be GREAT on a fall table.  I have been waiting PATIENTLY all year for autumn to arrive so I could use it in a tablescape...


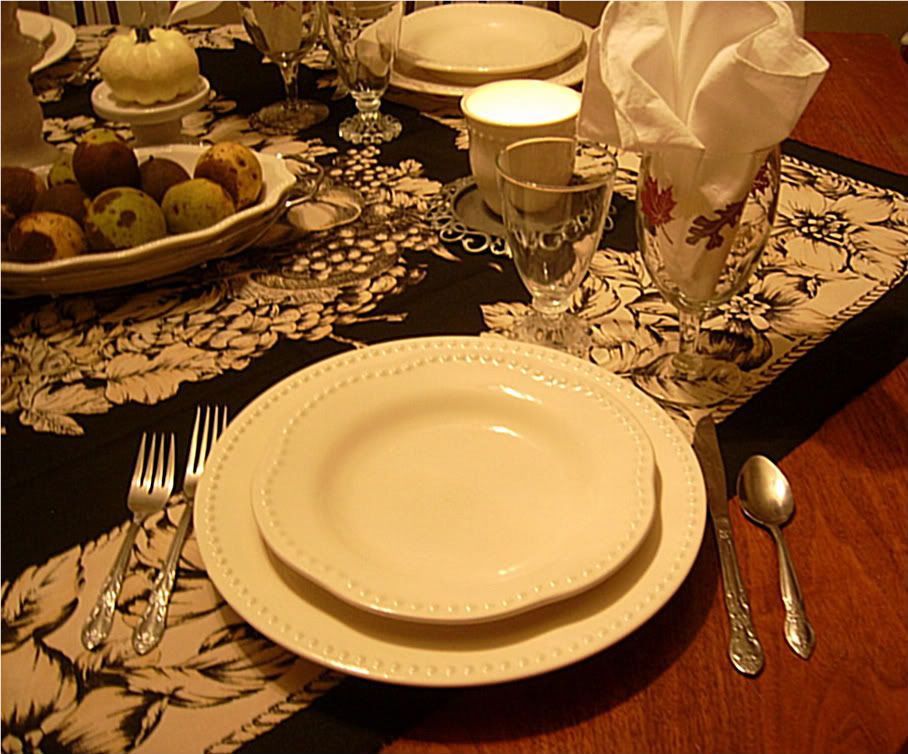
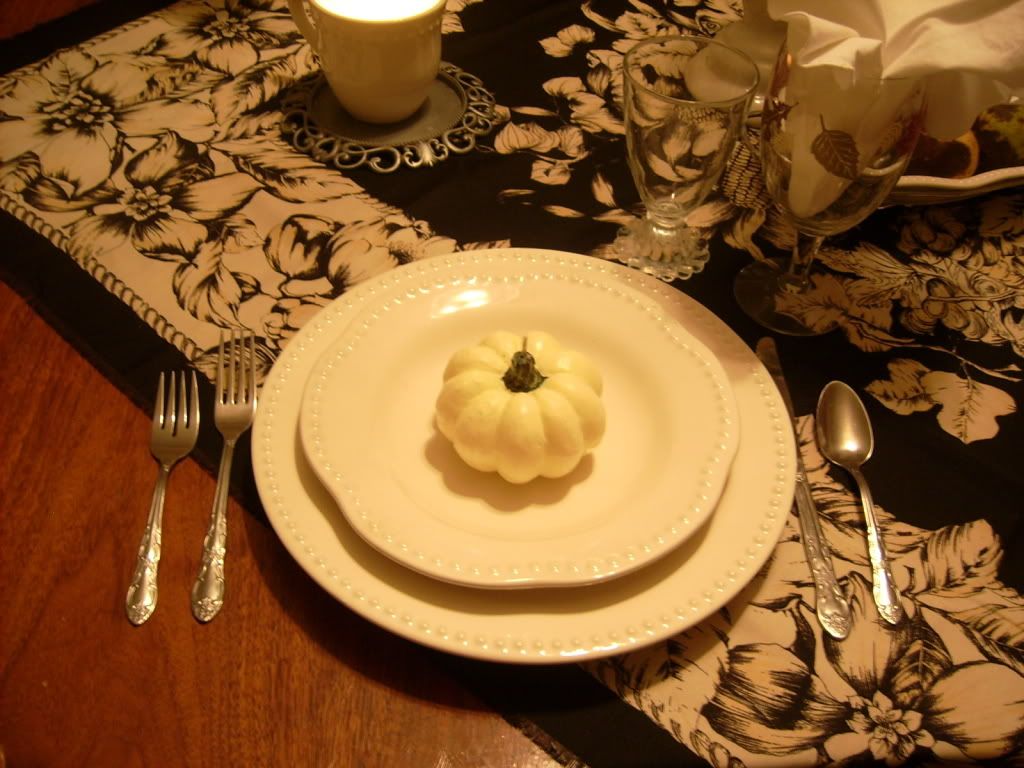
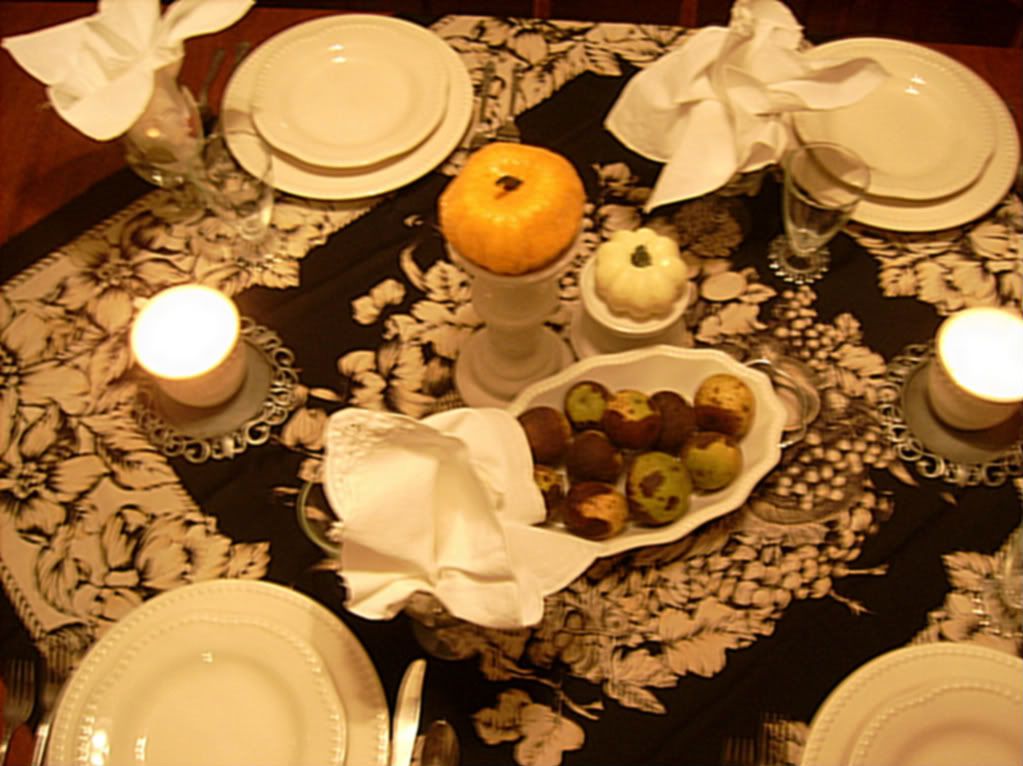
The tag on the scarf says "Made in Italy"...it is simply beautiful and I was blessed enough to have gotten it for a dollar...the center of this scarf boasts a beautiful fall bounty of corn, nuts, apples, pears, grapes, leaves and other harvested items...


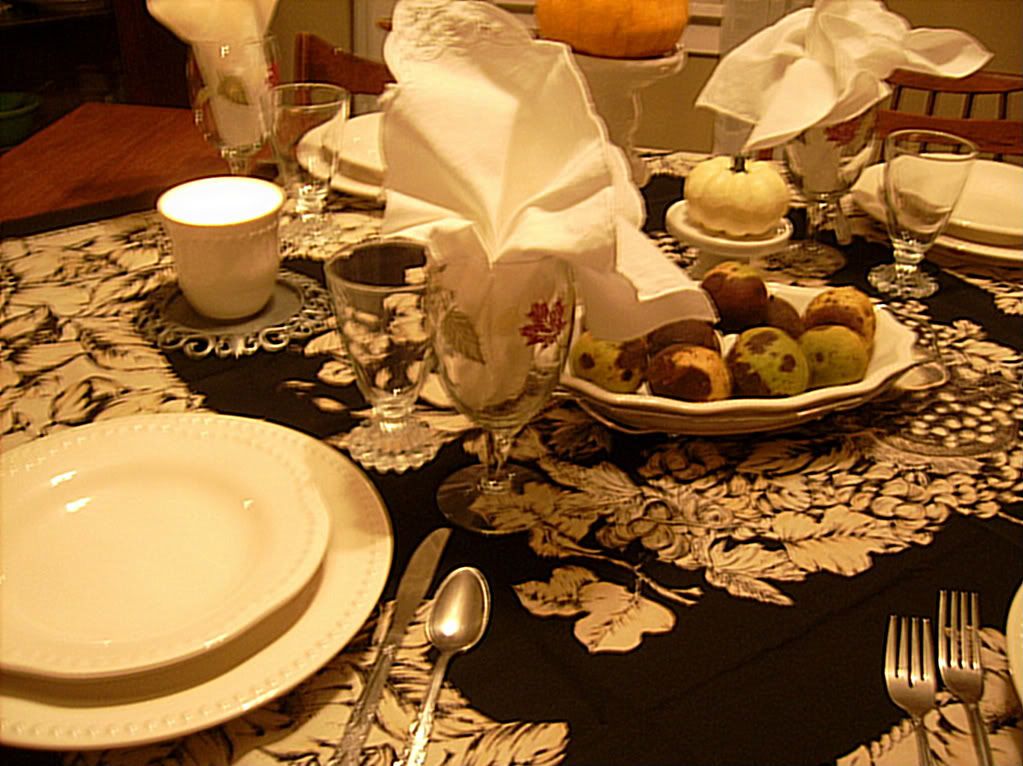
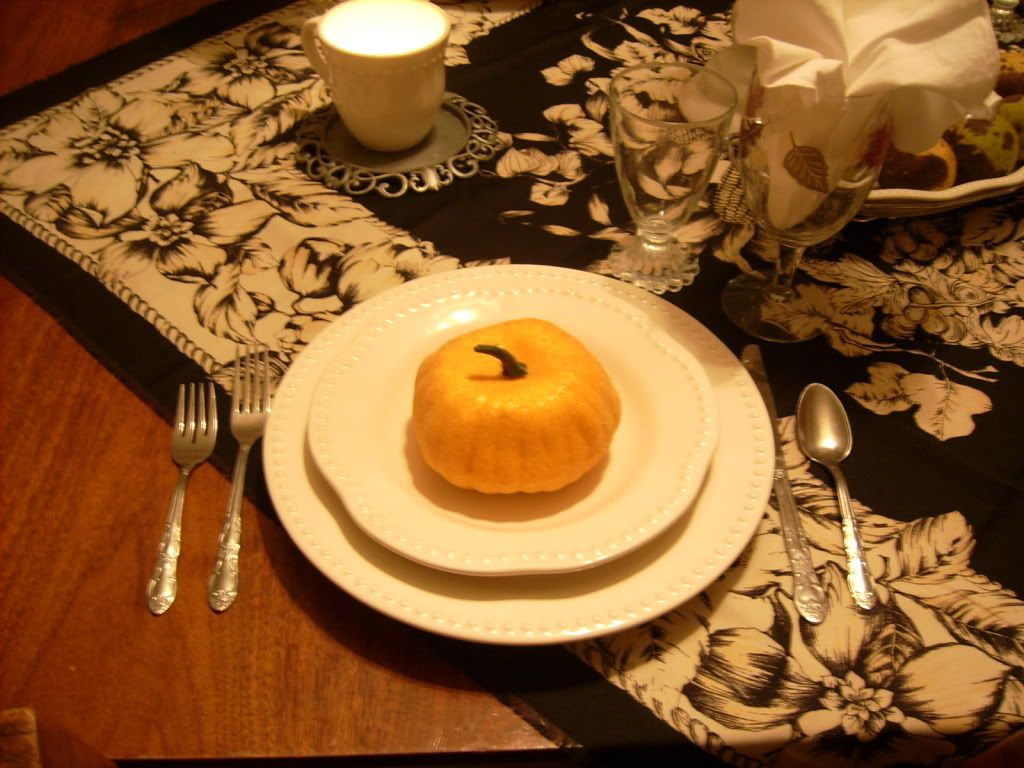
I paired this beautiful black and creamy white scarf with PB--Emma dinnerware...the leafy stemware is from Dollar Tree...and the bubble rimmed water glasses were from the antique mall here in town...those are my FAVORITE and they coordinate well with the dotted rim on the dinnerware...


The centerpiece boasts a bowl of walnuts freshly harvested and gives guests a hint as to what's on the menu...Crisp, white battenburg lace trimmed napkins, tucked gently into the stemware, steal the show...inviting guests to come and dine at this black tie affair...


Candlelight and music set the mood...


Tonight's fare includes a crisp garden salad followed by Walnut Crusted Pork Loin with Apple Maple Reduction and mashed sweet potatoes topped with cinnamon and brown sugar...a holiday worthy meal...but easy enough for any night of the week.


California Walnut-Crusted Pork Loin with Apple Maple Reduction 

BON APPETIT!

Joining Susan and a whole bunch of other talented ladies for Tablescape Thursday over at BNOTP.  Pop on over and feast on everyone's lovely tablescapes. 

Also partying over at The Thrifty Groove for Thrifty Things Friday. Stop on by and see everyone's thrifty finds.

Tuesday, October 11, 2011

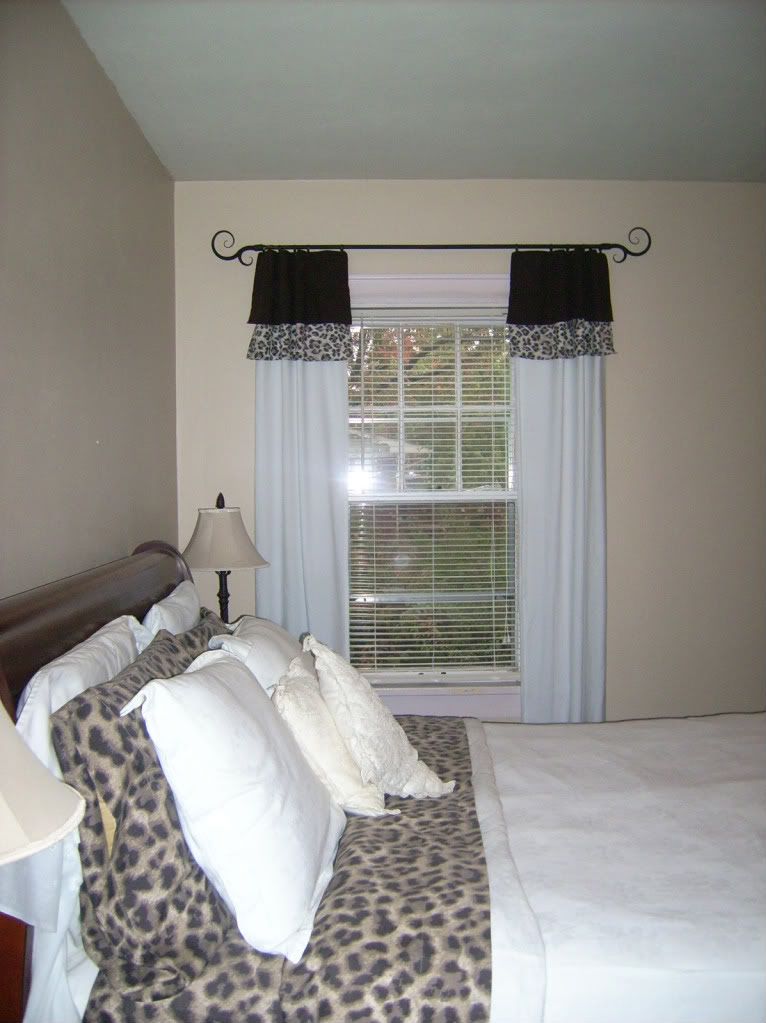
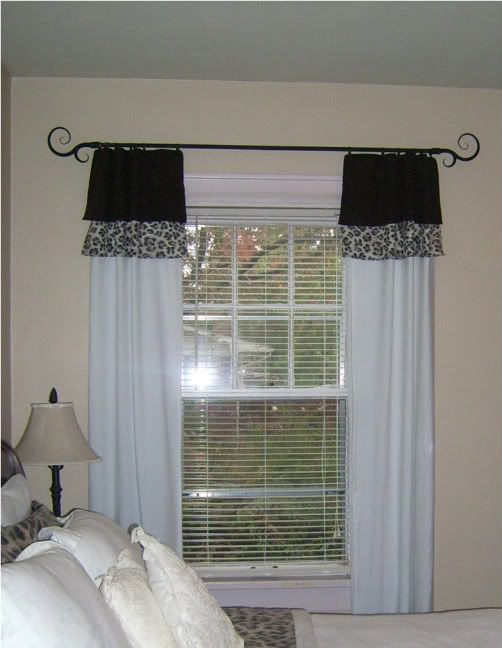
BEDROOM CURTAINS...CHIC ON THE CHEAP

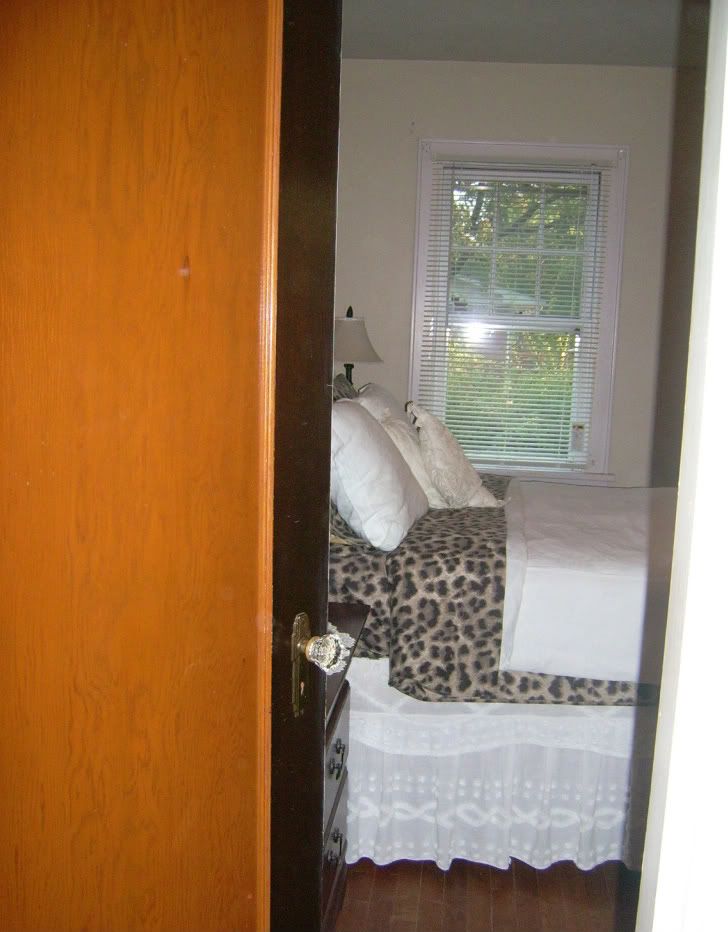
A month or so ago, I started redoing my pitiful master bedroom.  I got RID of the pink and flowers, Yay!!!  I started with a fresh coat of paint (Nomadic Desert Plains by Glidden)...a nice neutral cream color, and added some leopard print sheets to the white duvet set I already had.


The next step was to add some curtains...I wanted to incorporate more of the white and leopard print into the mix.  What I had in mind could NOT be purchased at any of the local stores (or probably any store for that matter) soooo, I had to make them. 


It took me a while to FIND the material I needed as we only have ONE fabric store in the area (a quilting shop) and they didn't have what I was looking for.  My next thought was to search the thrift stores...I'm GLAD I did because I found something I could use...A white king size COTTON BEDSHEET for $2.00...PERFECT.  I already had some light colored leopard print fabric on hand (which was my inspiration piece for this room redo)...If you will remember, I found it while thrifting a few months back...I got 2 yards for $1.00.  I had a little brown fabric left over from when I recovered some pillows on my couch a couple years ago (Yes, I keep things that long)...anyway that was everything I needed...


I cut the bedsheet LENGTHWISE into four pieces to make two pairs of curtains.  I added a wide strip of the brown and leopard print to the top of each panel to make a valance type of look and hung them from the rod with clips.  I love how they turned out and the best part this project only cost me a total of $3.00.


I have a few more things to do in here before I can say I'm finished (is that ever possible...to be FINISHED with a room?)....I have some cute wall art in mind for over the headboard but I am still looking for just the right frames to finish that up...I still need to do a little something with the lighting...not to mention, I still have to paint the window frames and doors...busy, busy, busy...but I hope to be done by Christmas...wish me luck!!!

Linking up to these great parties...stop by and have a look!!

Metamorphasis Monday @ BNOTP
Wow Us Wednesday @ Savvy Southern Style
Thrifty Things Friday @ The Thrifty Groove
Show Your Creations Friday @ Kristens Creations


Tuesday, October 4, 2011

HOMEMADE TASSEL...

Hey y'all, have you seen all the wonderful TASSELS hanging out in blogland?...Aren't they wonderful?  I have used regular tassels on lamp shades, as drape tiebacks and such but how about all of these cute decorative tassels...there is one to fit every style and room...who would've thunk it? 

I have seen some exquisite ones, whimsical ones, rustic ones...you name it, it's out there and I have been dying to have one of my own...but they are a little too pricey EXPENSIVE for me...soooo, I decided to make one myself...


...of course, this was not a professional job using the highest quality materials or the know how of all those skilled tasselmakers out there...but I think it turned out plum CUTE...

Although I would not consider this a TUTORIAL, the following shows what items I used and explains how I made my cute little Autumn Blessings Tassel...

Gathered my supplies...(these were things I had on had, I did not purchase anything except the burlap for this project)


The body of this tassel (what other's would call the topper) is this adorable little scarecrow plant/floral pick...Ain't he SOOOO cute...


NEXT, since I didn't have any fringe on hand...I MADE some...yes, I made several different fringes...some I made from raffia, some from burlap and some from the other fabric shown...

...this is how I did it...(sorry for the quality of my pictures)


...using tape (in my case electrical tape, I couldn't find my masking tape which would have worked better), I laid out a length of tape approximately 8 inches long and attached lengths of raffia to it...then topped it off with another piece of tape to secure the raffia in place...VIOlA' raffia fringe....I know FANCY, huh....(okay, I trimed the top up to make it a little prettier)...


...next, I cut a strip of burlap about 4 inches wide by 8 inches long...I wrapped a piece of tape on lengthwise at the top edge of the fabric (I used the salvage edge as the bottom of my fringe here, because burlap tends to unravel)...


Next, I cut the burlap in 1/4 inch wide strips all the way up to the tape line...


 ...until I had burlap fringe...I used the same process to make fringe out of the brown and orange floral fabric EXCEPT I made the fringe slightly shorter by using a strip of fabric that was 8 inches long by 3 inches wide...

Once I had my fringes made, I removed the stick from the scarecrow and began hot glueing each one, starting with the raffia fringe, around the bottom half of my scarecrow...


 ...after the raffia fringe I added the burlap fringe, then the brown and orange floral fringe...each time moving slightly up the scarecrow's body toward his waste...

Then I randomly glued on small strips of ribbon, folded in half to make loops, until I had several layers...to finish it off...I glued a narrow strip of ribbon around his waste like a belt to hide all the rough edges and attached a faux fall leaf for decoration...

...for the "hanger" I looped a 6 inch long piece of raffia...tied at the end and hot glued it to the back of Mr. Scarecrow's hat....VIOLA' ......my very own, one of a kind, cheap THRIFTY...homemade tassel.


Well, I know my little guy is not a high quality professionally made tassel...but I did enjoy making it...and I am thrilled with the outcome....I think I am going to make tassels for each one of my friends for Christmas (shhh...don't tell 'em)...provided I find the right toppers to use...AND of course, I won't be using ELECTRICAL TAPE to make fringe, lol...

...I guess I will just have to come up with something a little more sophistocated and high tech...hee, hee.

For a BETTER (more professional) tassel making tutorial...click the McKay Designs link below...


Have a GREAT day...and try making your own tassel...I would LOVE to see what YOU come up with!!

Joining Kate @ Centsational Girl for the It's Fall Y'all--Fall Crafts party...

[image%255B3%255D.png]

and these other fabulous parties:

Nifty Thrifty Tuesday @ Coastal Charm
Wow Us Wednesday @ Savvy Southern Style
Thrifty Things Friday @ The Thrifty Groove
Show your Creation @ Kristin's Creations


Monday, October 3, 2011

HELP...I'VE FALLEN AND I CAN'T GET UP!

Well, I'm sure I've missed the "It's Fall Y'all" Mantle linky party by now...with working full time, extracurricular school activities with the kiddos this time of year, and the usual weekly line up of chores, places to go and people to see, I am an extremely busy person...but I FINALLY got my mantle decorated for fall...WHEW...it has been a long time coming...but I can't be TOO hard on myself as it is only the BEGINNING of October...so without further ado...

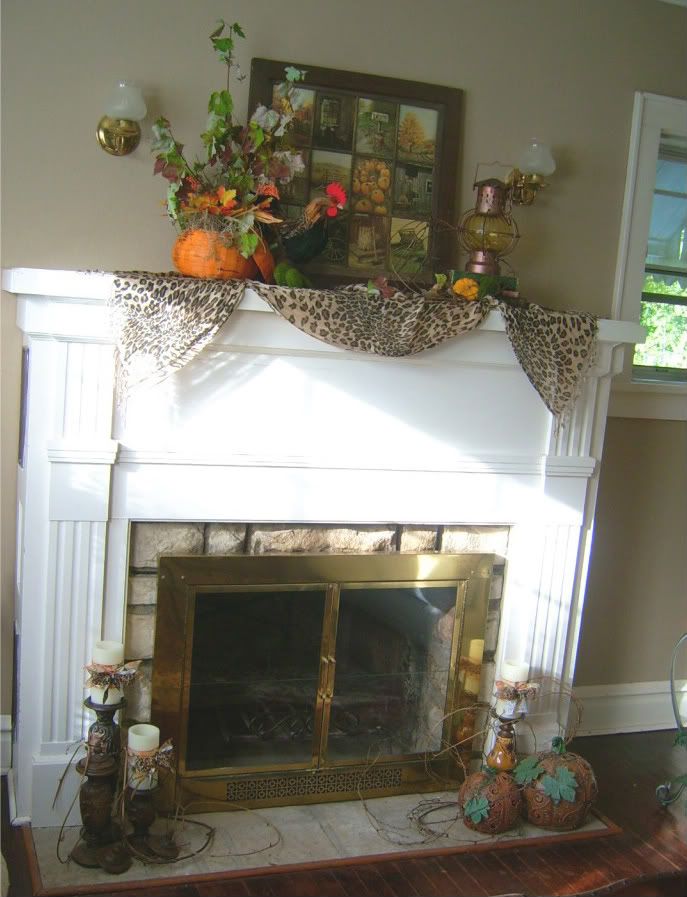
FALL MANTLE 2011...


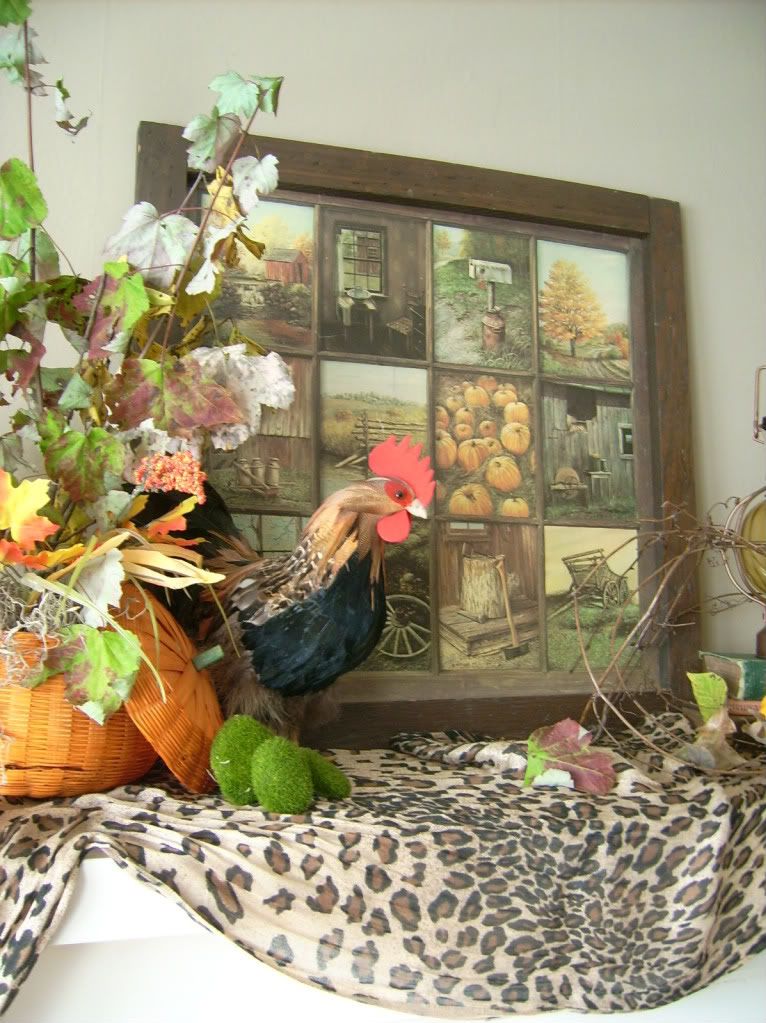
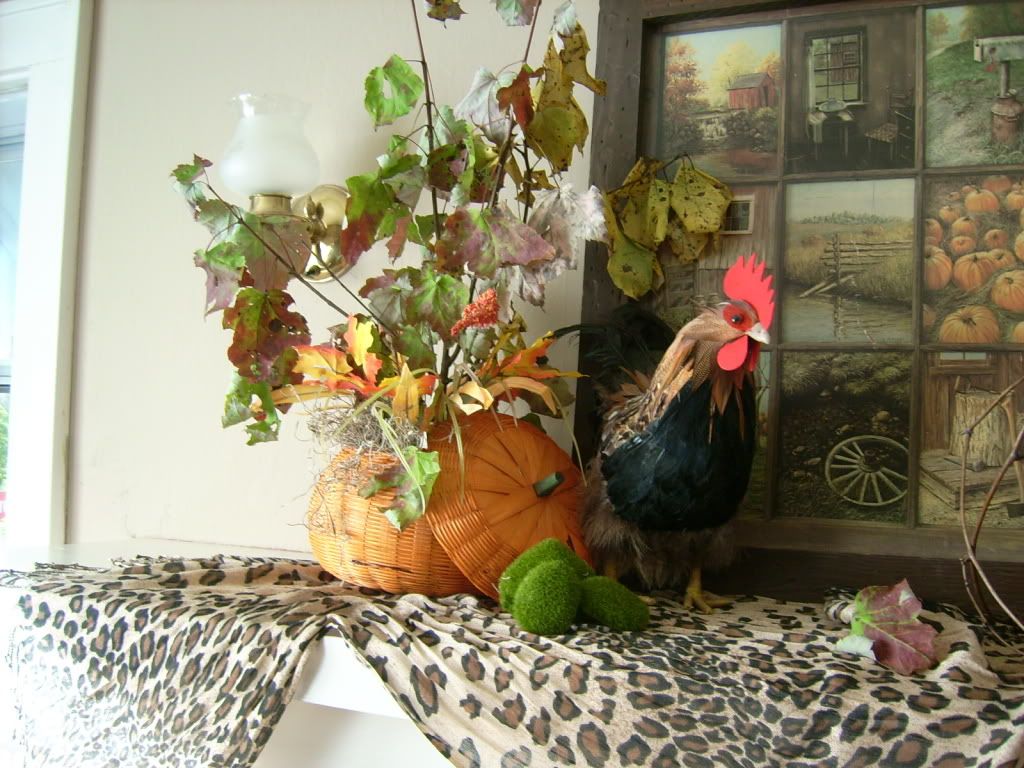
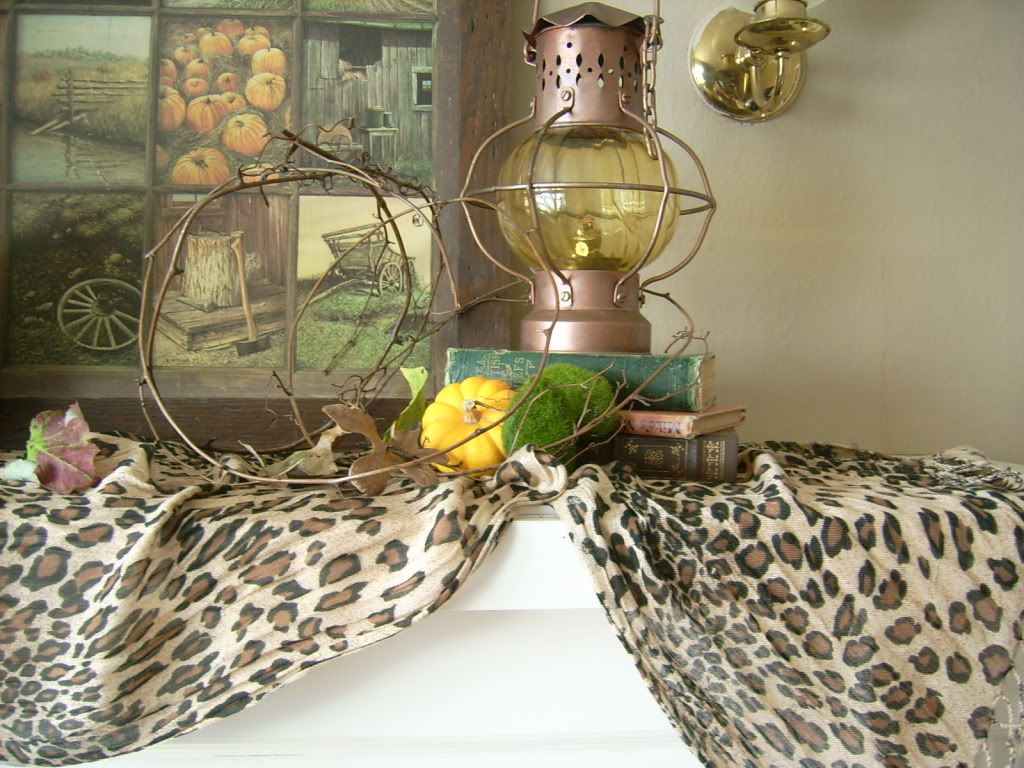
Remember the cute fall picture I thrifted for $2.00 a few weeks ago?...I off-centered it just slightly and used it as the focal point in this fall mantle...however, this piece is a little too RUSTIC for the more REFINED look I was wanting here, sooo....I went DIGGING through my closet and pulled out my delicate leopard print neck scarf (they're not just for using as clothing accessories ya know) which not only brought in some of the leopard print element I used in the DINING ROOM'S fall decor, but also added the element of sophistocation I was looking for here...

...well, at least that's my opinion...who would've ever thought of using leopard print as a fall fashion statement?...You guessed it...only ME with my quirky little mind, lol...


...To bring out some of the ORANGES from the print, I used a wicker pumpkin I found while out thrifting this past week and filled it with a REAL leaf covered branch I snatched right out of the woods...and to bring out some of the farmlike qualities...I tucked in my feathered ROO who had been dying to be released from packing box jail...he had been there since our move last year...poor little feller...but he's HAPPY now...


...to the right I stacked a few old books and topped them with a COPPER lantern I found while on vacation this past summer...I have been dying to find just the right place to use it...I think it looks FABULOUS here on my fall mantle...I tucked in a mini pumpkin, a few fallen leaves, some faux moss covered rocks and some grapevine to complete the look...

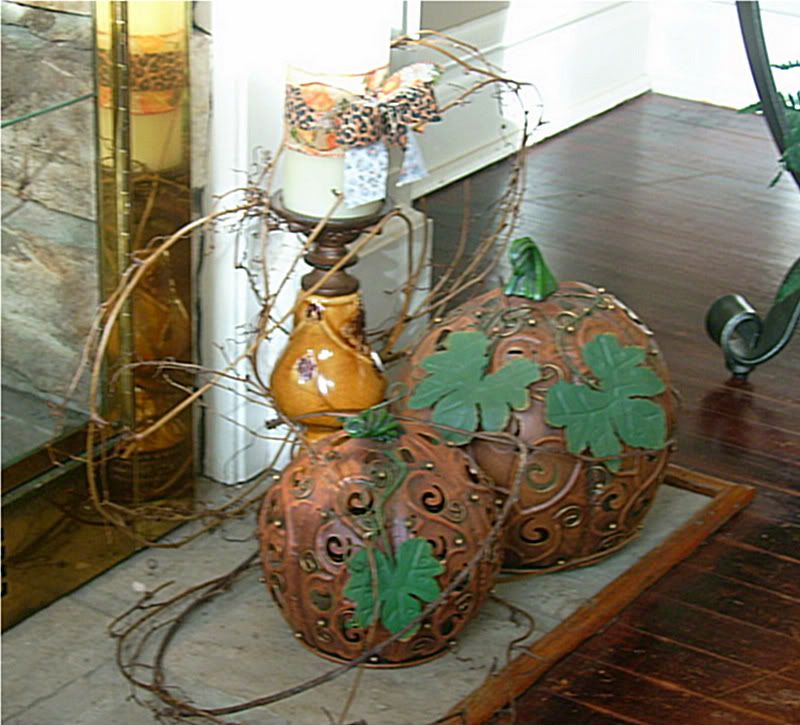
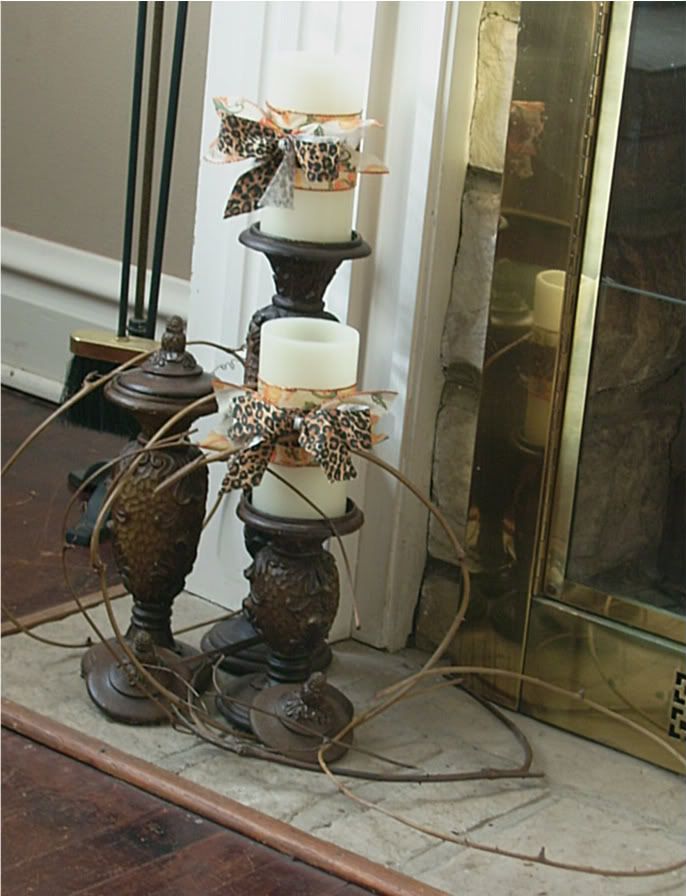
...for the HEARTH, I used an assortment of candle sticks featuring candles embellished with fall themed and leopard print ribbons...I threw in some grapevine and a couple adorable metal pumpkin lanterns I found while out thrifting a few weeks ago...


...and VIOLA'...my complete fall mantlescape...


...Well, I know I have gone on and on about this fall mantle of mine, going over every little detail,  but I am just SOOOO excited...wanna know why?...Well, I'll tell ya anyway...it's because this is my FIRST EVER FALL MANTLE...yes that's right...until we purchased this house one year ago, I had never owned a fireplace, and I am just TICKLED to finally have a mantle to decorate for the seasons....

 I'm linking up to some fabulous parties this week....swing on over a take a look...you'll be GLAD you did!!!

Tabletop Tuesday @ A Stroll Thru Life
Nifty Thrifty Tuesday @ Coastal Charm
Wow Us Wednesday @ Savvy Southern Style
Open House Thursday @ No Minimalist Here
Thrifty Things Friday @ The Thrifty Groove


Blogging tips