Tuesday, October 30, 2012

WHAT A BARGAIN...

Heya! How's everybody doing?  I'm great.  I'm lovin' the cool crisp air we are having here in Missouri.  Fall is truly my favorite season.  Makes me feel alive!  I love it!

Anyway, now onto something more exciting, like my newest thrifty find...

Last week my husband had some free time and decided to stop by the office and take me out to lunch....so sweet isn't he?...Anyway, while we were passing by the thrift store here in town this...


was sitting on the sidewalk right outside the door.  I said, "STOP...that is sooooo cute I gotta find out how much they want for it".  He said, "what do you need with another headboard.  We have all the beds we need." I said, "I don't know but I love it.  Surely I can find SOMETHING to use it for."  He just rolled his eyes.  He said, "Okay, but only if it's cheap enough."  And it was....it was only $1.00.  WHAT A BARGAIN!!

I think the hubs was secretly hoping it was expensive so he didn't have to drag it home for me.  Hahaha.  I had to go back to work but I can just imagine what he must have looked like trying to stuff that full size headboard into my little PT Cruiser.  Wish I could've been a fly on the wall about that time.  LOL

Anyway, I now have a beautiful full size headboard at home, that I don't need but that I love, and am trying to figure out something to do with it.   Do you all have any ideas?  What could I make from it?  Or what could I use it for, besides a headboard that is?


Friday, October 26, 2012

IS IT FROSTED GLASS?

Okay, I know it's been a long time coming....like ohhhh say 3 MONTHS...but remember when I painted my back door black (and the front door too) with my left over paint? I said then that I got rid of the old cafe curtains that were hanging there and that I had a special window treatment up my sleeve that I would be showing to you SOON...soon was not exactly the right word to use as, wellllllll...I AM A PROCRASTINATOR...okay not really.  I finished this cute window treatment the very weekend after painting the door...


So why haven't you seen it before now....cough, cough....Uhhh, it has taken me this long to get a decent picture of it....and this is not even a good one...the dumb thing just don't want it's picture taken I guess.

This was a super fun project (though somewhat time consuming) and turned out really cute.  I simply used good ol' clear contact paper purchased from Wal-Mart for around $4.00 for a huge roll.  I measured my windows and cut a piece of contact paper just the right size for each window.  I then used different size lids to make circles on my pieces of contact paper.  I cut the circles out which left the pieces of contact paper looking much like swiss cheese.  I then placed one piece on each window.  (The trick to getting the contact paper in place right since it is "sticky", is to spray the entire window with Windex and then place the paper.  The Windex makes it "slippery" so that you can get the paper in place before it sticks.  Then you simply wipe the excess Windex away with paper towels).  Once I had the "swiss cheese" in place, I filled in the "holes" with a little bit smaller circles, slightly off centered, to make the appearance of bubbles.  Why bubbles?  Well, since the door leads to the laundry room (the basement), I thought "bubbles" on the glass would be fitting.


So you might be asking, "What about privacy?".  That's easy!  Even though the contact paper says it's "clear" it has somewhat of an opaqueness to it which makes it look remarkably like frosted glass and gives me the privacy I need. Believe me, you CANNOT see through this stuff.  Thank God because I definitely don't want any strangers (or friends) peeking into my horrid laundry room.  It's a scary place right now!  

So what do you think, do you like my "bubbles" window treatment?  Cute huh?

Sharing at:

At The Picket Fence


Wednesday, October 10, 2012

I'M FALLING ALL OVER YA...

HAPPY FALL TO Y'ALL!!

How's it goin?  Did you think I forgot that fall has arrived?  After all I haven't shared any of my fall decorations yet.  Truly, I did get a late start at my fall decorating this year because of all the painting going on around here, but I have finally managed to get my fall buffet put together along with a few other things.

First let's take a look at last year's buffet....


Very simple and I loved it but there were no treats.  What's that, a buffet should have treats, right?  Well, this year WE.HAVE.TREATS!!!...


Yummy.....CANDY CORN with PEANUTS, CHOCOLATE COVERED PRETZELS and...


Reeses PEANUT BUTTER CUPS...of course everything is tastier when it's served up in glass apothecary jars!!


What do you think of my new homemade table runner?  Perfect fall colors don't you think?


Fall has happened over on my vintage china closet too...


HAY RIDES, PUMPKIN PATCH, CORN MAZE...I love this cute sign I found a few years back at a consignment shop.  I normally hang it out on one of my trees in the yard along with some other outdoor decorations, but she's starting to show signs of wear so I decided to keep her indoors for the season.


I plunked down a few metal pumpkins and tucked in some fall leaves by her for a super cute fall display.

Now onto the mantle....which is not exactly finished yet...It needs some pumpkins.  I am still looking for just the right ones.


This year's mantle sports my new DIY Sunburst Mirror.  This mirror was made from plain white cardstock and was very simple and inexpensive to make.  You can find out how I did it HERE...


The leaf  garland is real.  Some of the leafy branches came from my next door neighbors maple tree and the others came from the trees in my yard.  The cost...FREE!!  Sadly though, they will not last long so I will be replacing them with faux garland soon.


The tall branches flanking either side of the mantel are from the shrubs and bushes in my yard.  Once again those were FREE.  A very simple yet elegant mantle.  I love it!!!


Well there you have it...Fall 2012 at Beyond the Portico.  You can check out last year's fall decor HERE and HERE.

~HAPPY FALL Y'ALL~


Sharing at:

Savvy Southern Style
2805
Imparting Grace
From My Front Porch To Yours
No Minimalist Here
At the Picket Fence
A Stroll Thru Life
My Uncommon Slice of Suburbia
Coastal Charm

Tuesday, October 9, 2012

EEEEEEE....THE PAINTING HAS BEGUN...

Well as you all know, we began the process a while back to paint the exterior of our home.  It took more than a few months to scrape, sand and smooth out some of the more than 70 years worth of paint from the exterior of this house.  You can read about that HERE. Thankfully we have now begun the painting process and I AM SO EXCITED!!!


We chose to use Duramax paint by Valspar.  Really good stuff by the way.  I have nothing bad to say about this paint.  For the body of the house we chose a color called Gray Silt in the flat sheen and for the trim we chose Chef White in satin.   They look fabulous together!


We are really liking the new color.  It looks a little more gray in these pictures because of the lack of sun but it is a beautiful greenish gray.  Formerly both the body and trim of the house were white and because of that the beauty of the trim work was pretty much hidden, but I am loving the contrast between them now.


To date we have one coat on two sides and are getting ready to start the third side.  Painting is going much faster than scraping but we still have tons of work left so it's going to be while yet before we finish up.  Since fall has hit in full force here in Missouri we can only work when the weather cooperates but we are on a roll now and WE WILL GET THIS DONE!!!


Monday, October 8, 2012

DIY SUNBURST MIRROR FROM PLAIN WHITE CARDSTOCK...AND A TUTORIAL

Hey all, how are you this fine crisp fall morning?  I'm great, thanks.


Do you remember last week in my post about loving paper that I told y'all I had a paper project that you would not want to miss?  Well, here it is...

Do you guys love sunburst mirrors?  I do too!  I have been spotting them everywhere and have wanted one for a long time, but they are crazy expensive as you all are aware, so I decided to make one.  I have been inspired by the many gorgeous ones made by all you DIYers out there and decided it was time for me to attempt my own.

Here is my inspiration piece...


I saved this picture a few weeks back because I wanted to pretty much copy it but I forgot to write down the source and now I can't find it again.  I believe this one is made of light weight metal and runs, if I remember correctly, around $375.00 which is absurd!  I thinks Kirklands sells one similar for around $60 which I guess isn't bad but I think mine turned out looking just as good and it cost me less than $5 to make and only took a few hours of my time...

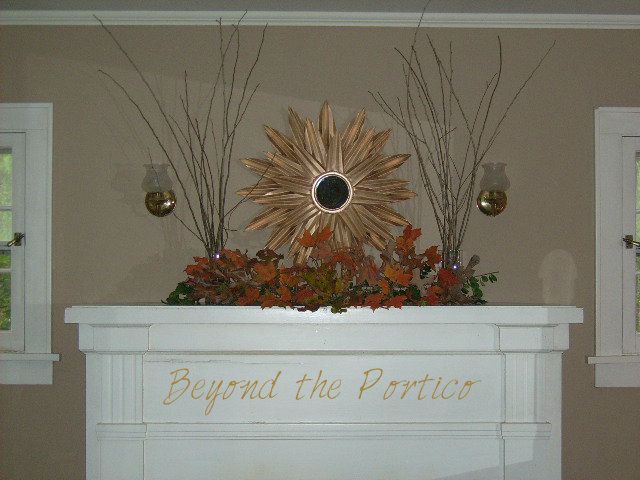
What do you think?  Did I do well?


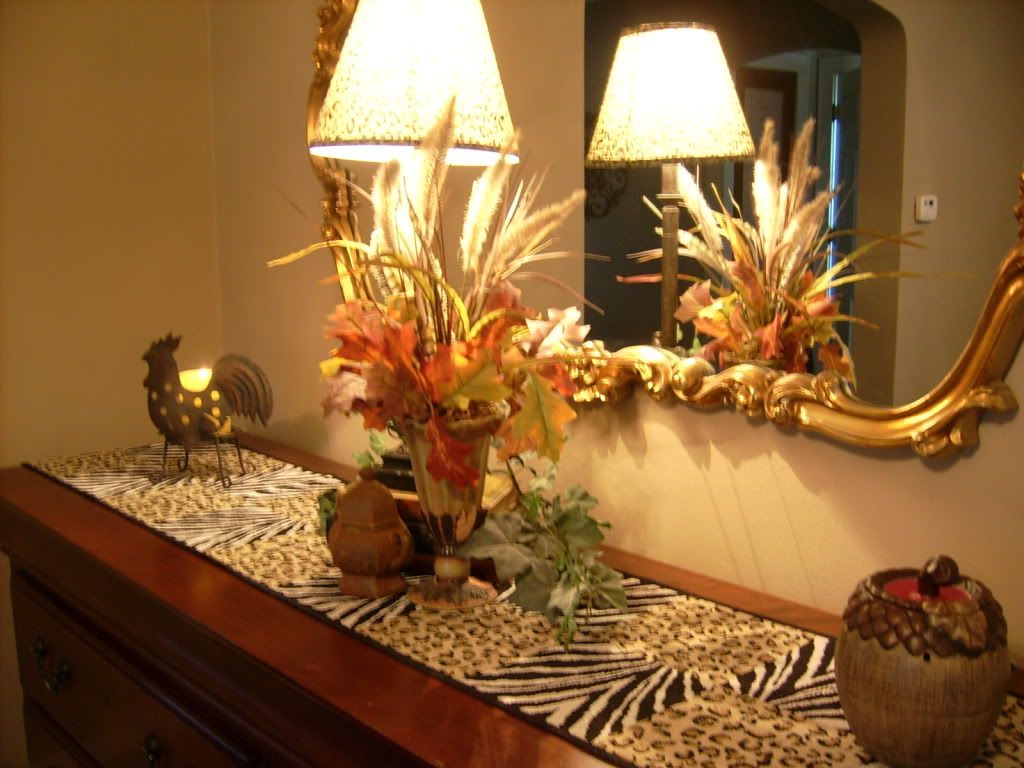
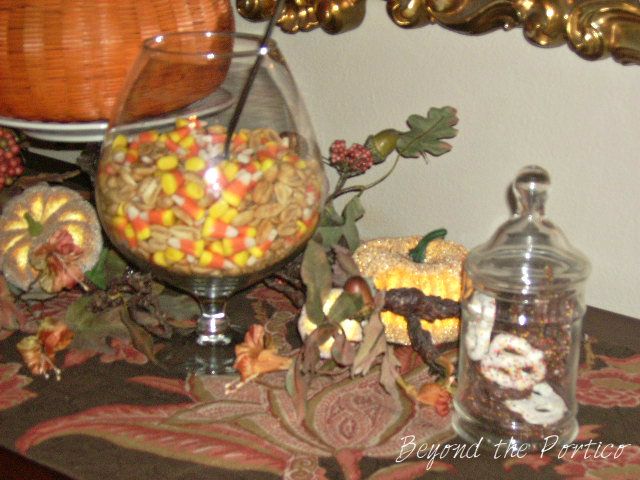
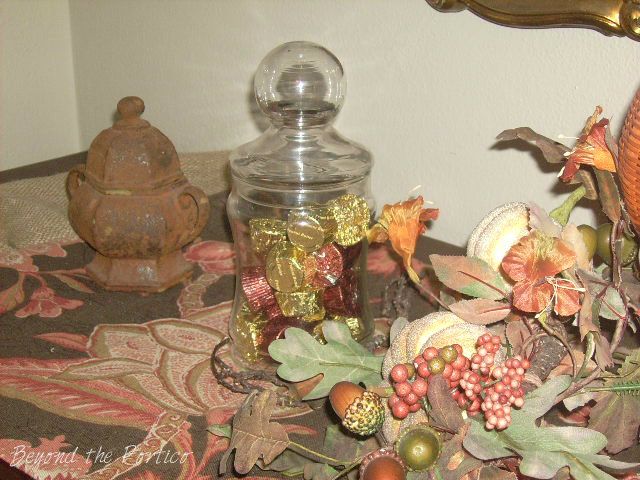
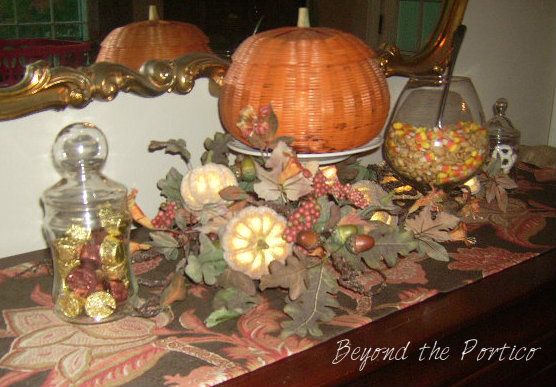
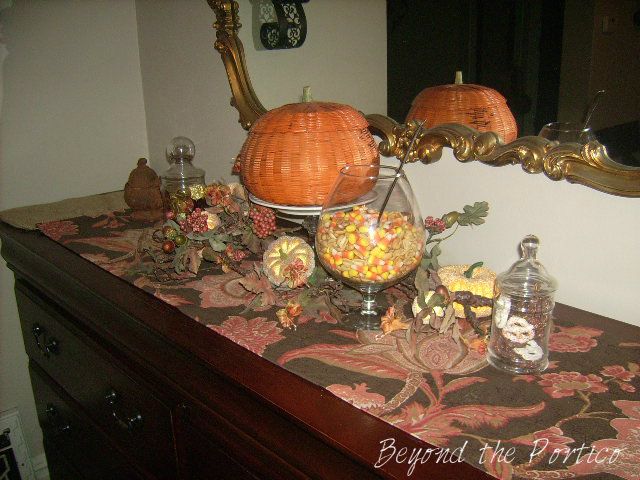
Well, now you can see the beginnings of my fall mantle...which I will show in more detail along with my other fall decor later in the week...so be sure to come back.

For now, how about a TUTORIAL on how I made this beauty...

I took my cue from The Nester and used paper for mine too.  However, instead of poster board, I used plain white 8 1/2" x 11" cardstock because I already had it on hand.  I think this worked better for my design rather than poster board because it was more pliable for all the folds I needed to make.


If you would like to make one of these for yourself, here is what you will need:

  • 16 sheets plain white cardstock (each sheet makes two "rays")
  • 4 cardboard circles (I used the backs of legal pads which I had on hand)
  • 1 5" mirror (mine was out of a hand mirror purchased from the beauty section at Dollar General)
  • 1 Cool Whip lid (this will be your frame for the mirror)
  • glue gun
  • glue sticks
  • 12" strand of small plastic craft pearls (or in my case bb's, what I had on hand)
  • 15" piece of rope or cording
  • Gold spray paint (or color of your choosing)
  • Dark colored stain
This is really very simple to make.  Using your cool whip lid as a template draw four circles on your cardboard and cut them out.  On each of three circles you will make lines as guidelines to position your "sun rays".  Draw 16 lines on one of the circles and eight lines each on two other circles.  The last circle should be glued into the underside of the lid for added support.


Next it's time to make your "sun rays".  I made three different sizes.  16 large (11" x 4"), 8 medium (9 1/2" x 3 1/4") and 8 small (8" x 2 1/2").  These measurements are approximations.  This thing does not have to be perfect to look good.  You simply need three different sizes.  

Fold each sheet of your cardstock in half lengthwise.  On three separate sheets draw on your three different size "rays".  Cut them out.  These will be your template for the rest of your "rays".


Once all of your "rays" have been cut, it's time to fold them (like you are making a homemade paper fan).  Fold each one down the center and then fold each side back and forth into a fan shape. 


Now on to the fun part...putting it all together.

Start with the circle with 16 lines and start gluing your largest "rays" to it.  You will position the center line of the "ray" onto one line on your circle.  Work in fours and glue them directly across from each other on the circle...


Note:  This one has 16 "rays", two layers (not shown) when it is complete. Now it's time to glue the medium "rays" onto one of the cardboard circles which has eight lines.  Glue these on in the same fashion, working in fours and gluing directly across from one another.  Next glue the small "rays" onto your last circle.

You should now have three separate flower-like shapes.   


I did mine in three separate shapes because I wanted to spray paint it and this made it easier....but before you grab the paint can, there are a few more steps.

Glue your Cool Whip lid to the center of your smallest shape.  


Next glue your strand of craft pearls to the inside lip of your lid (in my case bb's because it's what I had).  This is because your mirror is slightly smaller than the inside of your lid and you will want a nice, tight little nest to glue your mirror into later.  


Next glue your piece of rope around the outer perimeter of the lid.  This is to just to add a little extra thickness and texture to your frame but is completely optional.


Okay now it's time to paint...paint the bottoms first and let them dry.  The nice thing about spray painting paper is that it dries quickly (about 5 minutes per side).  Now turn them over and spray paint the fronts and let them dry.


Now it's time to apply a little stain.  Blotch it on lightly in different areas (usually on your tips and ridges) to give everything a little "patina".  I used Old English because that's what I had on hand but regular wood stain would be better.  My "patina" is not quite as dark and prominent as I wanted but this did work in a pinch.


Okay, almost done.  Now glue your medium sized shape onto the middle of the large shape.  When the glue is set, glue the smallest shape onto the middle of the medium shape.  Glue a paperclip onto the back for a hanger.

The final step...glue your mirror into the center of your frame (cool whip lid)...clean with Windex and VIOLA'  one very beautiful, incredibly inexpensive (yet very rich looking) SUNBURST MIRROR.  


Looking at the details...


Sharing at:

Between Naps on The Porch
Coastal Charm
My Uncommon Slice of Suburbia
2805
No Minimalist Here
Savvy Southern Style
At the Picket Fence
From My Front Porch To Yours
Imparting Grace
The Shabby Nest


Thursday, October 4, 2012

PAPER...I LOVE PAPER!

Paper, I love paper...all sorts of paper.

I love scrapbook paper, wallpaper, wrapping paper, craft paper.  You name it, I love it, but I don't use paper in the normal sorts of ways.  Yes, I occasionally use paper for writing or putting together a scrapbook page but mostly I use it in home decor.

Yes, I have used scrapbook paper to revamp small lamp shades...Just ask my friend Barbie...and right now I am working on a show stopper of a piece for my fall mantle, which I hope to show you sometime this next week, from plain white cardstock.   I have made numerous crafty home decor items from paper.  It's just so versatile.

Why all this talk about loving paper?....Well, I finally received my wallpaper samples from Farrow & Ball in the mail this morning.  My five samples were FREE of charge, because the people at Farrow & Ball are generous like that.  They did't even charge shipping.  I'm giddy with excitement as I study each beautiful piece.  They are quite large for samples... 8 1/2" x 11" sheets...and I know I will find some great ways to use them.


 I ordered the samples because I am wanting to line the back of my built-in bookshelves in the living room.  I ordered five different colors that I thought would work well with my new perspective wall color, Pale Smoke by Ben Moore.

Design:  St. Antoine BP 942


Design:  Silvergate BP 866


Design:  Silvergate BP 813


Design:  Orangerie BP 2511


Design:  St. Germain BP 1721

I think I am going to like the green the best; although, I love the light blue and the yellow too.  Decisions, decisions!!!

Anyway, if you are interested in sampling some wallpaper...whether your looking to wallpaper something, or just because you love paper like it do, swing on over to Farrow & Ball's site and order you up some samples.  You can receive up to five FREE samples and they have many designs and colors to choose from.

BTW, this is not a paid advertisement for Farrow & Ball.  I just like to pass along a good deal when I find one...and FREE is a good deal, right?  Yes, free IS good!!!


Blogging tips