Monday, September 21, 2015

WELL IT'S TIME TO LET THE CAT OUT OF THE BAG...

Hey, hey, how are you?  I hope your weekend was good.  Mine was fantastic and yet a little unnerving at the same time.  Here's why.

WE PUT OUR HOUSE UP FOR SALE!!


You may have wondered why the sudden push to get the floors refinished, get all the painting and tweaking done around here and that's it.  We really are not finished with everything....there are a million little odd and end things to do but we felt we were done enough to go ahead and get it on the market.

Now you may be wondering why we want to sell it after all the work we've put in this place for the past five years to get it the way we want it.  Well, we decided that we want a little place out in the country. We are getting to the age where town living is just too busy an environment for us.  We want to slow down, relax and enjoy some fresh country air.  We want a place where there's less traffic, less people and more space. We want a big dog and maybe even a couple small farm animals...I was thinking a miniature horse would be soooooo sweet.

Anyway, we have our eye on a few places that would be perfect for us.  Now we just have to wait for ours to sell.  I pray for my impatient sake that it sells fast!

We've listed with Kelly Johnston at Century 21 Prestige in Steelville, Missouri and couldn't be happier with the superb service we've gotten so far.  Kelly and Nancy, Kelly's assistant, are so easy to work with, very professional and super sweet. I know they will do everything in their power to sell our home quickly and make the transition effortless for us.

The only thing I was kind of disappointed in was their listing photos.  They are kind of dark because it was such a cloudy day out. Not their fault one bit! I was going to have them swap them out with some photos I took over the weekend but it would have messed up the Youtube listing so I changed my mind.

I thought the video was pretty good so I didn't want to mess with it.  Click on the play button below to view...


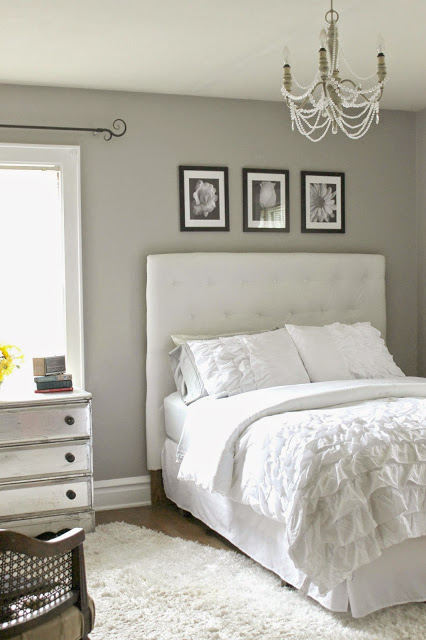
However, since I took the time to take some photos of my own, I figured I would share them with you here. They're not great either, not even up to my usual standards, which is pretty low, but I want to share them anyway so you can get a good over all look at the entire house.

It's picture OVERLOAD for sure...something like 24 pictures of the inside of the house but I think you can handle it.

Lucky for you I didn't take any outdoor photos or you would be here all day.  Hehe. Their outdoor photos were good enough so I didn't bother...

Anyway, HERE GOES...


I gave the main floor bath a little makeover last weekend with new wallpaper and light fixture...


It looks nice, fresh and clean now.


As you can tell I didn't get very many good shots either as this house is just really hard to photograph but I believe they are all good enough to sell this house.

So with that, if you are interested in moving to Cuba, Missouri and want to buy an historic home, contact Kelly, she will be glad to hook you up.  Hehehe.

I will keep you in the know, I promise!!

Have a fabulous week.


Monday, September 14, 2015

THE BIGGEST FIASCO..EVER!, A NICE PIECE OF FURNITURE NEARLY RUINED, AND A VALUABLE LESSON LEARNED...

Howdy!

The floors are finished and we finally have all the furniture back into the house, clothes have been put back in their closets and the decor has been put back in place.  Oh what a relief to finally have that HUGE project behind us...and oh how I love my new floors!!

Since we had to move all the furniture out of the house and we had to take the china cabinet apart to move it, I decided that now would be as good a time as any to give the cabinet the makeover I had been planning for it since I started the dining room redo over a year ago...you remember, right?


Anyway, I officially decided that I wanted to paint it black.


Easy enough, right?

NOT!!!

Now I don't like to be negative on this blog but you really need to know what happened...so you don't make the same mistakes I did.

A couple of weeks ago I stumbled across some Classic Home rich black chalk paint by Plaid in the paint isle at Wal-mart and it was only $7.97.


I picked it up because we had a couple small spots on the hardwoods to touch up before sealing. Mainly small spots where old wood filler had been used.  They did not stain over so I decided to camouflage them with the paint. It worked like a charm for that.  Since I had a ton left over I decided to go ahead and use it to paint the china cabinet.

THAT WAS A BAD IDEA!!!  This was the WORST chalk paint ever...and I do mean WORST!!!  I guess the old adage that you get what you pay for is true after all!!! Oh sure I got pretty good coverage but the finish was horribly blotchy and textured.  I guess it dried way too quickly. It left behind HORRIBLE brush and roller marks everywhere that WOULD NOT sand out. What's even worse than that is every time I would wipe the dust off, my rag would be completely black like if I was wiping the paint back off...The more I wiped the more black came off...Apparently it never really cured good either and it still would not smooth out.  What's up with that?!!  Anyway, I figured things would get better once I waxed it, so I went back to Wal-mart and bought the Classic Home brand clear wax that was there beside the chalk paint in the paint isle.


This shows white wax, I bought the CLEAR.


That was an even bigger mistake.  I applied the wax according to the directions.  It was a thick and gloppy (read messy) sort of liquid wax that took over 2 days to dry and left streaks and uneven marks all over the place that would NOT buff out.  I buffed and buffed and buffed but it NEVER got smooth and it was totally streaky too.  LOOKED HORRIBLE!


So, I went to Lowes and bought a can of Minwax paste finishing wax for $9.95 thinking that it would help me to achieve a smoother, less streaky finish.


I rubbed it on, let it dry and buffed it out and while I liked it a little better...because it was super easy to apply and only took 10 minutes to dry ..it still looked streaky. I guess I wasted my money on that idea too.

MAN OH MAN WHAT A MESS!!!!!

My china cabinet, which WAS a really nice piece of furniture, is nearly ruined.  Whaaaaa.  It's still good enough to use so it's not a total loss, but it just doesn't look quite as good or refined as I was hoping.


Needless to say the whole ordeal was the biggest fiasco I have ever been through when painting a piece of furniture. I actually broke down and cried because I ruined a nice (expensive) piece of furniture and didn't know what in the world I was going to do to fix it. As you know, once you wax you can't just simply start over by repainting. It would have to be stripped down to bare wood first and I'm just not going to go through that hassle.  It's going to have to stay the way it is.

With that, I learned a very valuable lesson and that is this...I will stick to painting ALL my furniture with satin latex paint as I always have.  You paint one to two coats of the satin paint and you are finished.  There's no painting, then waxing, then waiting, then buffing and taking three to four days to finish a piece of furniture..and there's no spending nearly $30 for all the supplies. A quart size can of satin latex paint is only around $12.  The best part about satin is that if you don't like it you can always repaint, no stripping involved.

I can say without a doubt I will NEVER use chalk paint again...unless it's my homemade kind using satin latex paint as the base...and I most certainly will NEVER use furniture wax again! It's just not worth the time, effort and frustration!!

On a more joyous note, we found an antique wrought iron bed frame for bubs room almost exactly like the one on my design board that I showed you HERE.


I will show you how it looks in his room later on when I get a few more things done in there.  I can't wait to see how everything works out.  Of course you can be sure I will share it all with you.  Until then,

Ciao,


Friday, September 4, 2015

NEW SOAPSTONE COUNTERS FOR THE KITCHEN...WELL SORTA...

Happy Labor Day weekend everyone...a nice LONG weekend...YAY!!!

So, while waiting for the hardwood floors to cure this week, we decided to tackle a project we have been wanting to do in the kitchen...replace our ugly old formica countertops.  The formica would not stay glued down and the trim edge kept falling off, even after gluing AND nailing it on a million times. UGH!!


We had initially thought a long time ago to just put new formica, that looked like granite, on them. However that stuff is a little pricey ($90 a sheet) and extremely hard to work with.  We were also afraid that it too would not glue down properly onto the old wood and that it would be a complete and utter waste of time and money.

Ultimately we figured we were just going to have to replace whole counter.  I wanted soapstone...


Gorgeous, right?

However, ANY kind of counter that would go with our home, whether it be granite, marble, soapstone, etc. were all very pricey too. Not to mention we would have to pay someone to remove our 600 lb. farmhouse sink (yes, it really weighs 600 lbs.), to install the counter and then put the sink back in place. That wasn't in the budget for sure. Not now or later...but we needed to find some kind of remedy...and fast. The reason being...well, it's a secret for now, but I will spill the beans in a few weeks...Anyway after looking to Google and Pinterest we came up with this...

FAUX SOAPSTONE COUNTERS...


Via
The lady had the same kind of nasty, ugly formica counters that my kitchen sports and did a little DIY magic on them to make them look like soapstone...GENIOUS!!  I ran the idea by the hubs and he was all for it. So I came home from work Monday to this...


Ewwww!!  Yes, all the formica was ripped off the counter. I guess that meant we were actually going to do this thing...WHEW...that's a pretty scary venture!!!  What if it didn't turn out...then what?

Anyway, I gave the wood (with all that old glue on it) a quick sanding to knock down some of the roughness but still left enough texture there to make it resemble natural stone. Then, I taped everything off and gave it two coats of chalkboard paint and let it dry...


Don't look at my messy, nasty floor...we are in the middle of some nasty jobs around here and I just haven't had the time to mop.  Hehe!!

Anyway, I didn't like the flat, stark black look so once it was dry I added a light coat of leftover SW Mindful Gray (from Bubs' room) and then wiped off the excess before it dried so that the black would show through. Doing that added some depth of color and you could see more of the texture also.  I also added some "veining" so it would look more like real stone...


Ahhh yes, it's looking good!!

I gave it all three good coats of polyurethane to seal it.


I think it turned out great.  What do you think?

Of course, this is a temporary fix but I think they look pretty good if I do say so myself!!  Pretty close to real soapstone...Hmmm, who would've thought? Hahaha.  I have a little caulking and paint touch ups left to do and then it will all be finished up...and not a moment too soon either...because the floors are cured and we will be moving back into the house over the long weekend.  YAY!!

Have a wonderful Labor Day Weekend!!! Ciao


Blogging tips