Friday, October 31, 2014

A TRIBUTE TO THE ANTIQUE CHINA CLOSET AND INFO ON THE DINING ROOM MAKEOVER...

Well hello there! Long time no bloggy.  Sorry for that. It's been a busy week or two around here preparing for the Bub's birthday party and other fall events but I'm here today to let you all know that my vintage china closet has sold.  I was serious when I said that I wanted to sell everything in the dining room and replace it with something that is more my taste and style.

As you know I sold the buffet a month or so ago and used that money to buy a nice china cabinet which I plan on painting as soon as I can figure out how to get the glass out of it...(ha I guess I should have thought about that before I decided I needed a china cabinet with window muntins)...most likely that will be the last project I tackle in this little dining room makeover.

I am super excited now that I have sold the vintage china closet because...the money is going towards my new Restoration Hardware style dining table that my father-in-law is building for me...it should look something like this when he's finished...


Purdy isn't it?  Yep, I can't wait! However, I suppose I should take a moment and pay homage to the old china closet. After all she did hold lots of china and had a great sturdy top that saw lots of decorating and vignettes over the past few years that I had her...hmmm, kind of makes me wonder about her history and how other ladies in the past used her (or decorated  her).  Oh the stories I bet she could tell.

Anyway, I thought I would share with you some of the looks she has sported since I have owned her. Sounds like fun, doesn't it?

She started out looking like this...


but I wasn't too crazy about that look so I changed it up a bit and this is what she looked like during the rest of her stay with us...


Minus this kitten, of course!!

I especially loved to decorate her up for the holidays...


I couldn't find all the holiday pictures but she has been decorated and redecorated to the hilt for each and every major holiday. I've had so much fun with her!

I sure will miss decorating her up, especially since the only flat surface I have left in the dining room to decorate or add a centerpiece to is the dining table, but that's quite alright because I am really looking forward to the new dining table. It's going to be fantastic!  Besides, I know this little cabinet is going to a good home and will see many more years of good use...

The lady who bought her told me that she was going to paint her all up in shabby chic style and use her in the bathroom as a towel/linen closet.  Sounds like a great plan to me.  I wish I would have told her to send me some pictures of the transformation. It would be fun to see her in her new home wouldn't it?

So now as far as the dining room transformation, I will be selling the old dining room table and chairs as soon as I get the 6 original chairs that came with the table painted (they are not shown here)...


I also will be selling the red and cream rug...


This was the only decent shot of it I could find.  I am excited to say that I have already ordered it's replacement....


A chunky jute rug from RugsUSA.  They are having a 75% off sale this week (I figured I would let you in the on the secret in case you want to save big money on a nice rug for yourself). The sale ends Monday so you better hurry! 

Mine should arrive at the house sometime next week. I can't wait!

I am taking this whole dining room makeover one step at a time...selling what I don't want, to buy things I do want and I am trying to choose the things I buy carefully so that I am truly happy with the end result of this makeover.

This is the first time I have tried this sort of method for redoing a room and so far things are working out great and progressing much faster than I thought they would. I usually buy first and then sell what I don't want later at a yardsale or something but I think this way is working out much better with far less work and with less spending too, believe it or not.

I am making more money by selling my items on Craigslist instead of at yard sale prices (or just giving stuff away to get rid of it).  I am also saving money by purchasing items when they are on sale or at a reasonable price on Craigslist and DIYing things whenever I can. Plus, I will not have to go through the work of storing, pricing and setting up a yard sale next year just to get rid of the things I don't want...they will already be gone to the wonderful shoppers on Craigslist.

I think I am going to do a little tally at the end of this makeover to see how much money I saved or spent throughout this whole process...i.e. what the bottom line is...I'm curious to know and I'm sure you are too, right?

If the results are good (which I believe they will be), I think I am going to try this method for the living room redo as well.

For now I am just taking one room at a time...it's WAY less stressful that way...and if there is anything I need less of these days it's stress! Hahaha.

Anyway, saying goodbye to an old piece of furniture has never been so fun and full of excitement.


What have you been up to lately?


Friday, October 10, 2014

FALL MANTELS PAST AND PRESENT...

Have I ever told you that I love having a fireplace with a HUGE mantel?  Well I do! None of the other houses we lived in had fireplaces. In one of our earlier homes I did have a custom made 5 foot long shelf that I enjoyed decorating but that just wasn't the same has having a mantel.

Needless to say, I have enjoyed styling my beautiful mantel for the different holidays and seasons since we moved into this house. I have especially enjoyed decorating the mantel for fall each year. Well, I didn't decorate for fall last year because I was just too pooped and if you will remember my ONLY fall decorations last year was a chenille throw and a vase full of leafless branches on the dining room table. Yep, that's it, but in 2011, 2012 and this year, I went all out with my fall decor.

I like to change my vignette's out from year to year and I never do the same thing twice. That's probably because I can't remember what I did the year before, hehehe. However, I do like to reminisce and look back from time to time. Since it's cold and rainy out today, it's the perfect time to grab a cup of warm cider and a cozy blanket and do just that. I thought I would share with you my fall mantels past and present today so pull up a chair and grab a cup of Joe or cider and enjoy.

My 2011 mantel was pretty rustic...


I found the rustic fall picture for just a few dollars at a local thrift shop and knew it would be perfect for my newly acquired mantel.  I added some other rustic things like my rooster, copper lantern and grapevine that I already had on hand and despite my poor picture taking abilities, I think it turned out great.

My 2012 mantel was dramatically different. A lot simpler but perhaps more sophisticated with my DIY sunburst mirror made from plain white card stock.  You can find the tutorial HERE...


I simply flanked the mirror with some twigs cut from the yard, added some fresh colorful leaves cut from trees in the neighbors yard (yes, I asked first) and that was that.  Gorgeous, don't you think?

This year I had a little trouble putting my mantel together. I started with a shuttered window mirror but it was a little too small and was a little too country style for my taste so I changed that mirror out with these three mirrors that were hanging over my buffet before I sold it...


It looked great and I thought I was done but I found something just a little more "fallish" to replace those three mirrors...


a big ol' tree. The epitome of fall, wouldn't you say?

You might have also noticed the new wall color. Classic Gray by Ben Moore (mixed in Valspar eggshell finish paint).This is the first real glimpse you have gotten of it since I painted earlier this summer.

I wasn't sure I liked it at first but now I love it. It really lightened and brightened the place up and it is a neutral so it's goes with just about everything. I love for my rooms to be neutral so that I can switch out accessories with the different seasons and I don't have to worry about what colors I choose. They all go.

Right now I am loving the little pops of autumn color against this light neutral gray background.  So pretty!

Well, I hope you have enjoyed reminiscing a little with me and perhaps you have gotten a little inspiration for your fall mantel as well.

Have a TERRIFIC weekend!


Sharing at:

Grace at Home

Thursday, October 9, 2014

DIY FRENCH FLOUR SACK GIFT BAGS...AND A LITTLE APPRECIATION GIFT TO THE PASTOR...

Not only is October the first and most beautiful month of Autumn, it is also pastor appreciation month. Of course you all probably already knew that if you attend church on a regular basis.

My pastor is pretty new to our church so I wanted to make him and his family feel welcome and truly appreciated for leaving their home in Arkansas to be with us here in Missouri.  I figured some fresh baked goodies should do the trick...


Yummm, fresh baked Pumpkin Bread and Apple Streusel.

These breads turned out fantastic even if they were made from box mixes (shhh, that's our little secret) and I needed an equally fantastic looking way to package my little appreciation gifts.

They say (whoever "they" are) that the best gifts come in plain brown paper but I have to disagree. I think the gift wrap should be just as pretty or as good as the gift itself. It's all about presentation, don't you agree?  With that in mind I made some super easy FRENCH FLOUR SACK GIFT BAGS...


I  used simple supplies I already had on hand. To make the bags themselves I used simple inexpensive flour sack towels from Wal-Mart...


They come 5 towels in a package for just $4.88.  You can make three decent size gift bags from just one towel.

Here's how to make them...


1.  Fold the towel lengthwise in thirds and CUT along each fold.
2.  Iron each section to remove any wrinkles
3.  FOLD each piece in half where to two finished edges meet at the top.
4.  SEW a straight seam down each of the raw edged sides

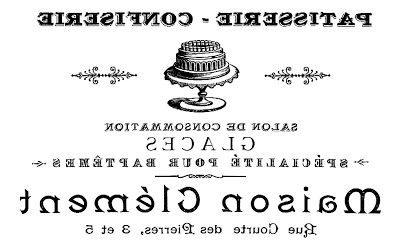
Viola' the sack is finished.  I could've stopped right there and packaged my bread but I wanted to make my sack just a little fancier with a little french flair so I used the "Freezer Paper Transfer Method" to add some french typography labels from The Graphics Fairy to the front of the bags...


I did this with freezer paper, an inkjet printer and an iron.  Here's how...

1.  CUT the freezer paper into an 8 1/2" x 11" sheet (standard printer paper size).  You can use a regular sheet of paper as a template.

2.  PRINT your graphic onto your freezer paper using an inkjet printer. Freezer paper has a shiny side and a dull side. You will want to put the paper into your printer to where the graphic prints onto the SHINY side of your paper. If your graphic has any kind of lettering or numbers you will need to print it as a mirror image.  The Graphics Fairy site has all kinds of great images and many of them are already in mirror image format.

NOTE:  You want to make sure that you are using an Inkjet printer and not a laser printer for this transfer method. Laser printers use heat to print the toner onto the paper. Freezer paper has a plastic side that will melt and stick to the inside of your laser printer.  It will RUIN the printer. DO NOT use a laser printer for this transfer method!

3.  Position your freshly printed graphic face down onto the front of your sack. Be sure not to touch the ink with your fingers it will smudge.

4.  Place your hot iron (no steam) on top of the graphic and iron for about 60 seconds until freezer paper is adhered to the sack.

5.  Using the back of a spoon or edge of a credit card and using pressure burnish over the entire image to make sure everything is set and then lift the paper off.

Your image should now be on your sack.  Yay!! Note: the image will be a little more faint than the original printed image but I think that makes it look more authentic.


I used these images from The Graphics Fairy for my gifts bags...

French bakery label...

French Typography Transfer - Patisserie - Bakery


French Typography Transfer - Patisserie - Bakery


Paris Manufacturing typography label...


I really like the french bakery bag and thought it was perfect for my home baked goodies gift to the pastor...


It took no time at all to make these cute little bags. From start to finish took about as much time as it took for the bread to cool after coming out of the oven.

Once everything was ready I wrapped each loaf in a sheet of waxed paper and tied with jute twine....


Two 8" x 4" loaves fit in just one bag...


I tied the top of the sack closed with a length of twine....DONE!

I really love how these super easy FRENCH FLOUR SACK GIFT BAGS turned out. It was a FUN project too.  I hope you will try it.  Each sack costs about .30 cents to make.  Less if you make more than 3 sacks per towel.

I'm thinking these would be PERFECT for Christmas!


Sharing at:

Grace at Home


This was a featured post at Imparting Grace.  Be sure to go check it out! Just click the featured button.
  

Monday, October 6, 2014

FALL MANTEL(S) 2014...

I love fall!  It's a wonderful season and the cooler temps this past weekend made me dream of bonfires, chili cookoffs, pumpkin farms, bobbing for apples and all sorts of fun stuff. I was also thinking about lighting the fireplace...well maybe not lighting the fireplace but decorating the mantel.


I actually started on the mantel a couple of weekends ago but didn't quite like how it was turning out. Though I don't have a direct picture of it, this was my first attempt at this years fall mantel...


from the little sneak peek picture I showed you last week.

I used a shuttered window mirror I got from Home Interiors years ago as the focal piece but it was a little on the small side and once everything was added it just seemed WAY to "countryish" for my taste. Though it was cute something was off.

However, I kept it that way until I took down the three mirrors from the dining room when I sold the buffet. I then decided to try using the mirrors in place of the shuttered window mirror and it looked pretty good so, I thought I was done.


But...there's ALWAYS a BUT, isn't there?...I spotted a great metal tree wall hanging at a local thrift store on Saturday for just a few dollars and right then and there I knew it was perfect for my fall mantel because after all...aren't trees the perfect representation of fall?

So I bought that big ol' tree. I went home and took down the three mirrors and put the lovely fall tree in their place...


Ahhh, yes that's just what this fall mantel 2014 needed...a big ol' tree.

I replaced the long thin branches with a perfect bunch of floofy (is that a word?) weeds I found on the side of the road...yes, I stopped on the side of the road and pulled a handful of weeds (that smell wonderful, almost like mint) just for my fall mantel...I have been known to do stranger things in the name of decorating just so you know! hehehe (Remember the HUGE fresh pine branch I stole from the Catholic church yard last Christmas to make garland for the mantel? Shhh, they still don't know about that). So I ask, Why not decorate with weeds (or pine branches)? They're free and pretty!


I tucked in a few munchkin pumpkins along side of my favorite fall decor...the metal pumpkins. I found them at a yard sale for just a few dollars the year we moved into this house.


I have to say after looking at these pictures that I like both the mantel with the mirrors...


and the tree...


Pay no attention to the candles in the fire pit.  I know I need to add a little fall in there too, or at least have a fire, huh?  Maybe when it gets just a little colder!

Anyway, which mantel do you like best?


I'd love to hear from you.


Wednesday, October 1, 2014

IKEA LENDA CURTAINS...THE PERFECT CURTAINS....AND OUR NEW LITTLE FUR BABY...

Can I say that I am still stoked that I finally found the perfect curtains for the living room and dining room...Yeah, it only took 4 years but I found them nonetheless.  They are the LENDA curtains from IKEA and they were only $19.99 per pair.


I had been looking for some white or natural linen (or linen like) curtains for a VERY long time. I needed them to be quite a bit longer than the standard 84 inches long.  However, the curtains in the stores around here only go up to 84" in length and I needed mine to be roughly 93" long. I could have ordered something online in the length and style I needed but linen curtains or long curtains are quite expensive. Try anywhere from $75-$125 per panel (I needed 4 panels)...OUCH!

For the past couple years I had been hearing from other bloggers the praises of IKEA curtains.  So I thought I would give them a try.  I used some of their VIVAN curtains for the master bedroom and I wanted to try the RITVA curtains that DEAR LILLIE writes about for the dining room and living room but, they can't be ordered online and the nearest IKEA to me is 300 miles away. Needless to say a trip there is out of the question for me. I found some on Ebay and bought them but when they arrived they were just a little too "ivory" in color for me so I sold them to some one else.

That's the biggest problem with buying ANYTHING online. If you can't see it in person first you really don't know if it will work.  Most things look quite a bit different in real life then they do online so...

Back to the drawing board...I had heard that the LENDA curtains were a "more natural" white than RITVA (and they are) but I was hesitant to buy them because they are tab top curtains and tab tops are a little to casual and sloppy looking for me.  However, the price and length was right so I went for it and ordered the "bleached" white.  They come in two colors bleached white and light beige. Note: the bleached white are NOT a stark white.  They are a soft white but not quite ivory...if that makes sense.

Anyway, I figured I could just sew the tabs down and make hidden back tabs like so many of the new style curtains out now....


Once I did that, I washed, dried and ironed them. They are 100% cotton so I figured they would shrink some. They shrank A LOT...like about 5 inches and when I hung them they were a tad too short...UGH! (shaking fist in air and stomping feet)...STORY OF MY LIFE I TELL YOU, THE.STORY.OF.MY.LIFE!!!

No problem though, I just ripped out the seam where I had sewed the tabs down and hung the curtains from the tabs which added 4 inches to them. As I said, I wasn't crazy about hanging them by the tabs because I thought they would look sloppy but I found the solution to that problem too. Instead of pulling the excess fabric in between each tab to the front like this...


Source unknown...these are NOT Ikea Lenda curtains.


I pushed mine to the back and set the tabs closer together and it gave them the more finished, formal look I was wanting...


They are now the perfect length too, hanging just above the floor...


These come pre-hemmed so technically had I not sewed the tabs down to begin with I wouldn't have had to do anything to these except for wash, dry and iron them.


I LOVE 'EM!  They are the perfect natural soft white that goes great with my Classic Gray walls...which, by the way, I am truly loving now...They're perfect...the walls and the curtains. They go with everything...including that God awful yellow geometric chair...hahaha.


Oh, and there's a little glimpse of my fall mantle too.  I would show you more but I am contemplating changing it up a bit. As soon as I'm done I will give you a good look.

Besides my new curtains, I also want to introduce you to my new little fur baby...ACE...


Isn't he soooo CUTE? We weren't really in the market for another pet but he was a stray who kept showing up at the church to play with the children.  The bubs named him and begged to bring him home with us.  We couldn't resist.  He cried a little the first night but is very well adjusted now. Nuisance was very jealous but she is getting better and is now allowing him to sleep by her sometimes. Though he prefers to sleep like this...


He's so cuddly and cute!

He latched on to one of the bubs' tiny little teddy bears and now it's his "baby".  He even plays fetch with it.  Yes, he plays fetch and he's not a dog. Maybe he thinks he's a dog. Hmmm, I wonder...anyway, if I get the chance I will make a little video of him "fetching" his baby and play it for you someday.  It's ADORABLE!!

Until next time, have a FABULOUS day!


Blogging tips